MAKING PRIMITIVE FIRE
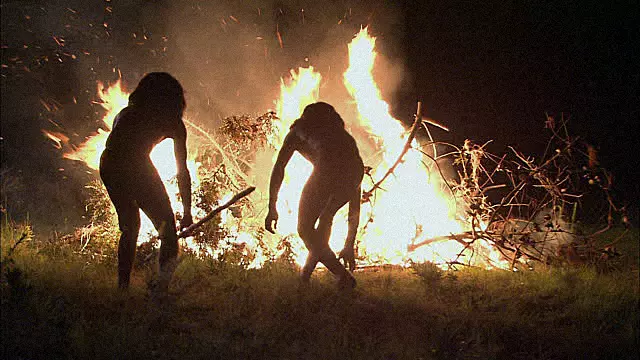
As I analyze and think of how fire was initially created by our early ancestors, I raise more questions than answers. Was fire made by accident? Was it an evolutionary trait caused by increased nutrition and cognitive development? Or was fire well thought out and slowly evolving through trial and error? As science in anthropology advances, the answers to these questions are within reach. Some of the technical methods we are using to answer these complex questions include modern technologies such as virtual simulation and reconstruction models, survey equipment, careful excavation, Native oral traditions, and much more. While we still do not know how fire was first created, because of archaeological investigation and physical data recovery, we have been able to answer the question of how people made fire over 1,000 years ago. Indeed, this takes us closer to a larger goal of its origins of creation. In this article we will discuss one of the oldest methods of creating fire with a technique referred to as the hand drill.
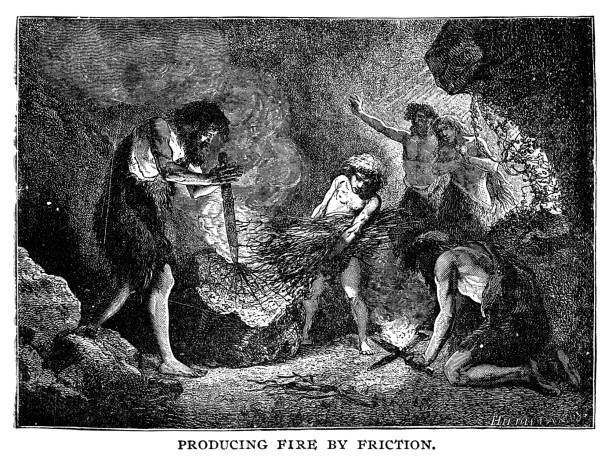
Caveman producing fire by friction – Scanned 1890 Engraving 
In our modern culture we tend to take advantage of fire without realizing its critical importance and sense of self security. This lack of awareness is likely due to an evolutionary process of how easy we have made traditional methods of fire reconstruction. By pushing a button we can turn on a fireplace. Turning a knob lights our stove top. Flicking a wheel creates instant flame on a lighter. Indeed, these advancements have greatly improved the human experience through time and space. The question now becomes, What can we use fire for? In wilderness living we know fire has many uses that greatly increases our methods of environmental regulation. Fire allows us to cook food, boil and disinfect questionable water, keep warm, control pests, smoke animal hides, preserve meats, bend bow woods and arrow materials, make pottery, harden tools, create adhesives, make dyes, and so much more! For the beginner however, the creation of fire using the hand drill can become quite difficult and frustrating. The reason being, you are relying upon your physical capabilities to create an ember. My recommendation is to practice this skill constantly and learn what works for you as an individual.
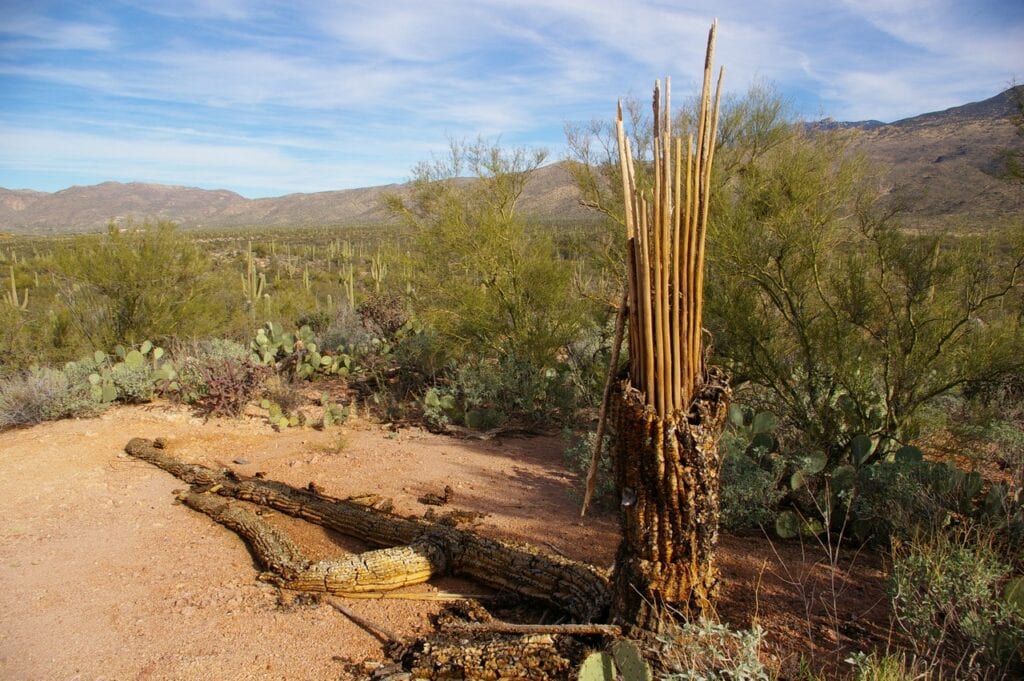
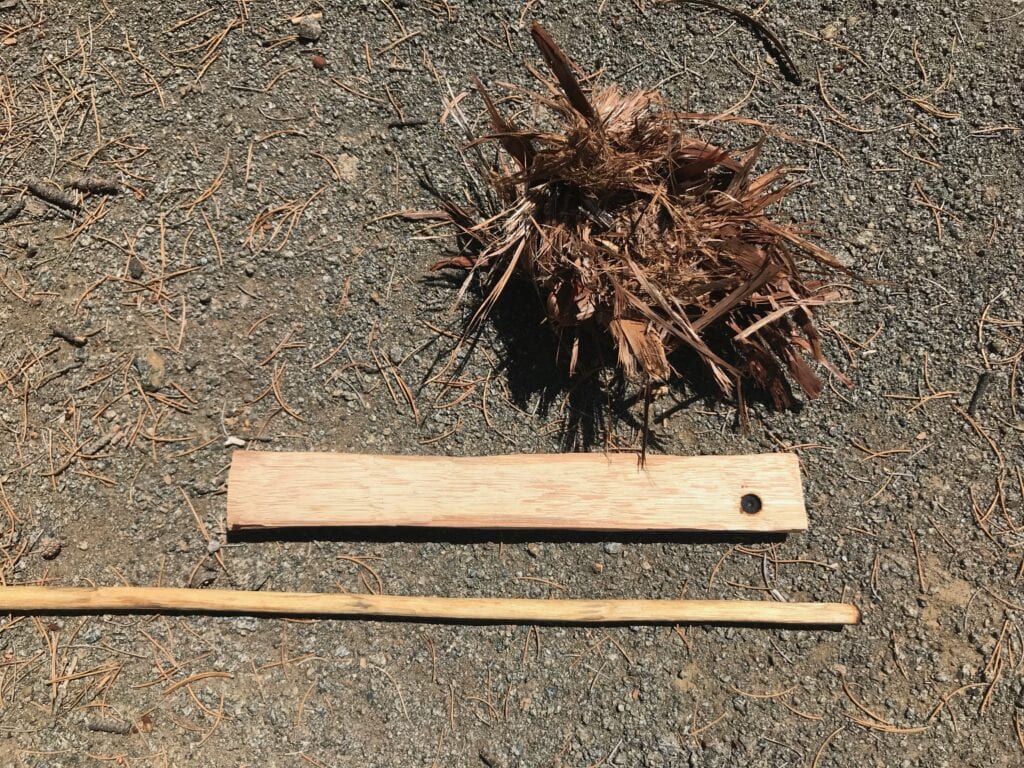
Every hand drill set should have two components—a fire board(hearth), and a drill(spindle). The woods you select for both components are critical in this process of fire creation. Without the proper combination, creating any sized ember will cause more blisters than success. For the hearth I recommend using soft woods such as cottonwood root, fan palm rib, saguaro rib, willow, or beargrass. In regards to the spindle, suitable materials include willow, mule fat, bear grass, mullein, and sunflower. Keep in mind the materials you gather are region and climate specific.
When you have the proper woods selected, it’s time to harvest a tinder bundle. Your tinder bundle will carry the ember and ignite into flame. In the American Southwest, shaggy bark juniper, cottonwood inner bark, dead yucca leaves, and dry grasses are all acceptable tinder materials. However, juniper seems to be the best material to use. Over the years of conducting experimental archaeology, I notice juniper burns hotter, catches a flame very quick without emitting a heavy amount of smoke, processes finer than other materials, and requires less oxygen when blowing the tinder into flame.
Once the dry tinder bundle and hand drill materials are gathered, you will need to process and alter the raw components. The first thing we will discuss is processing the tinder bundle. Start by taking a long strip of juniper bark or cottonwood inner bark and form a ribbon; this should look like the cancer awareness ribbon displayed on the bumper of a vehicle. Next, weave the tag ends into the sides of the ribbon and tear off narrow strips of bark that will nest inside as a base layer. Lay them vertically and horizontally while keeping a 0.5cm gap in-between each strip of bark. Now take chunks of bark equivalent to a baseball size and process it by shredding the material fine. Place the shredded material inside of the ribbon and on top of the base. You will notice there is a fine juniper powder left over from shredding the bark. Add this to the top of the bundle and press down so the nest will cradle the ember.
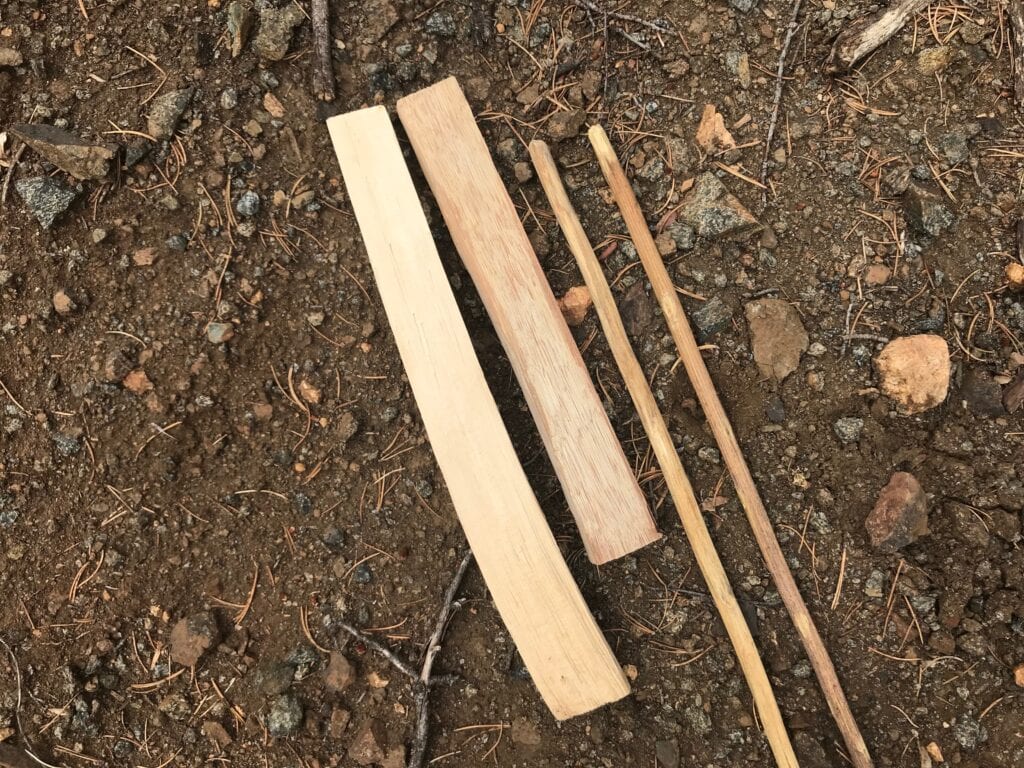
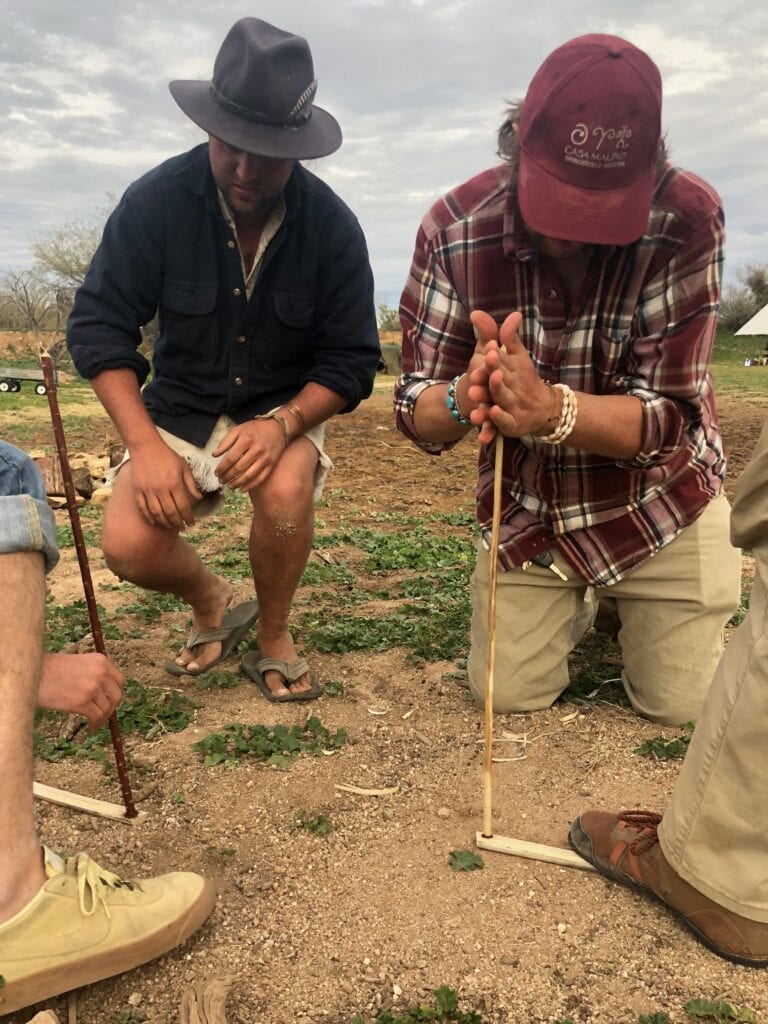
When the tinder bundle is finished it is now time to prepare the hearth and spindle. As you process each component you will also work in small steps to create an ember. Depending on the woods that are being used together, each hand drill set can be different and the hearth will sometimes be thinner or thicker in size. For example, fan palm ribs are very soft, so they should be thicker. On the other hand cottonwood root is a bit harder and it should be carved thinner. When carving the hearth use a knife to shape out the material into flat and rectangular board. For the spindle, simply use your knife to flatten out all the knots and rough spots; this will help save your hands from blistering. At the bottom of the spindle, where it will meet the fire board, expose the inner wood and round the tip.
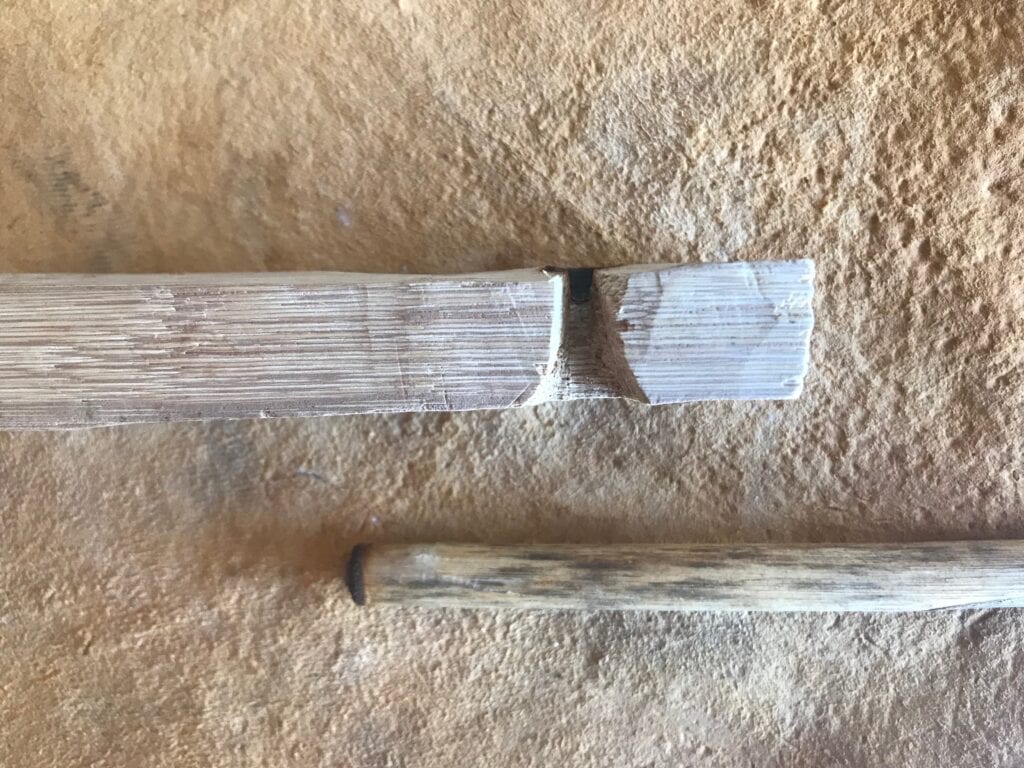
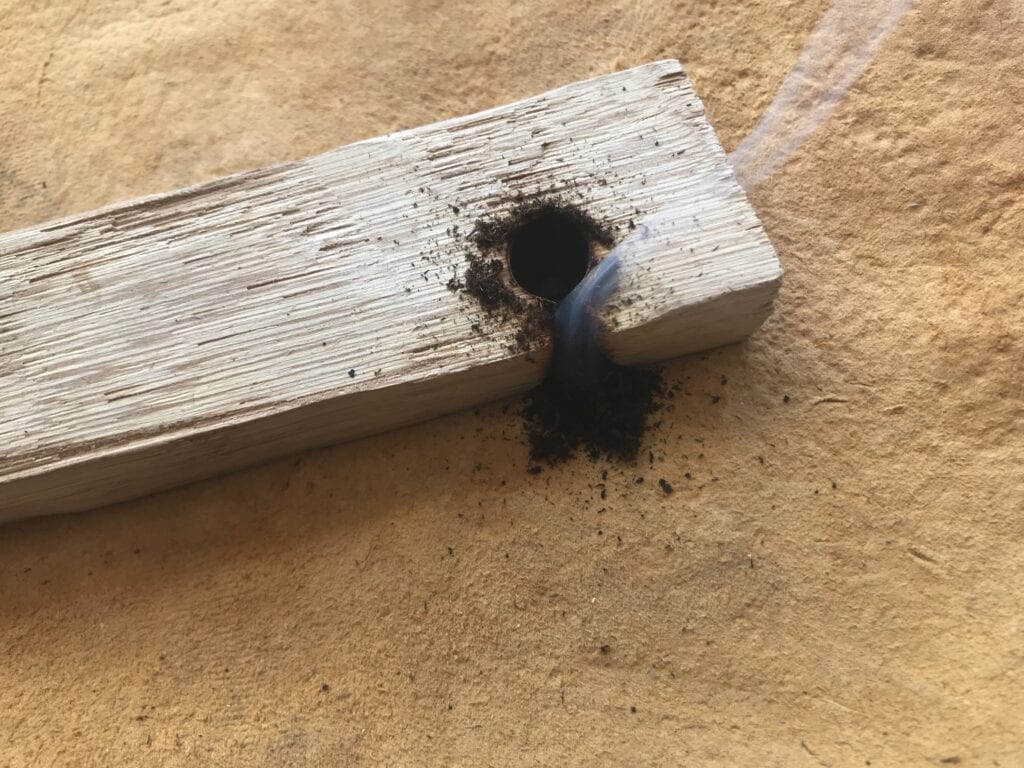
Once your kit is shaped out, carve a slight depression into the hearth with the tip of your knife and place the spindle vertically into the depression. While kneeling or sitting, you want to stabilize the hearth on the ground and begin to rotate your hands back and fourth on the spindle. During this time downward pressure on the spindle needs to be applied. When the depression takes form you will see smoke accumulating and the hole will turn black; this is called seating the drill. Now it’s time to carve a notch. This is where I see many who are new to primitive fire go wrong. Your notch should not be too wide, deep, or shallow. It needs to be cut in just right. The notch should have a pie or “U” shaped cut, extend just shy of the half way point inside of the depression, and a flare at the bottom is wise for allowing more oxygen to flow into the hearth. (see picture for reference).

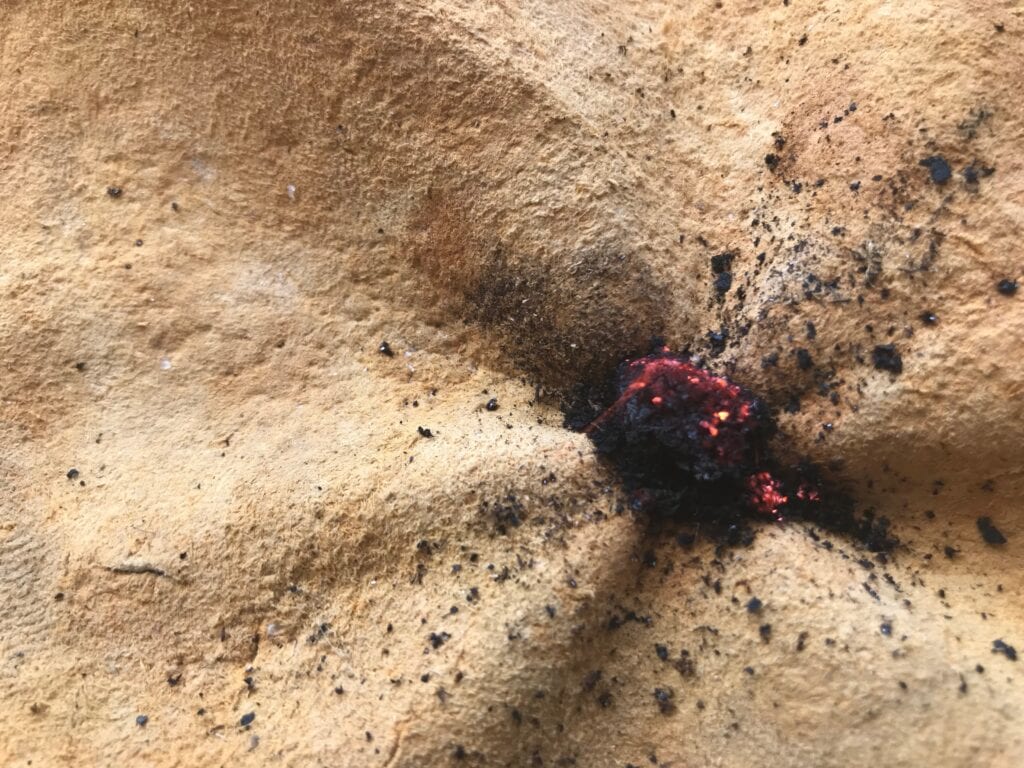
After notch is made, place your hearth on an ember catch. This catchment can be a strip of bark or a slice of leather. Insert the spindle into the depression and attempt to make a coal. Begin by slowly drilling and warming up the components. While doing this, apply downward pressure as your hands float in one place or move down the spindle. When the smoke starts to become heavy, apply more downward pressure and speed up your hand rotations. You will see a black dust fill up the notch and eventually begin to smoke on its own. When this happens carefully remove the spindle and tap the top of the hearth while pulling it away from the ember you have created.
At this point it is very important to control your body’s movement and enter into a relaxed state of mind. I have seen many get so excited they pick up the ember from the catch and smother it. Slow and methodical movement will aid you from here on out. While keeping the ember resting on the catch, fan it carefully with your hand. When you see the ember glow red add it to the tinder bundle and blow it into flame. Start off with slow and steady breaths of air. When more smoke accumulates and the ember consumes the tinder, blow harder until the nest ignites into flame. Now
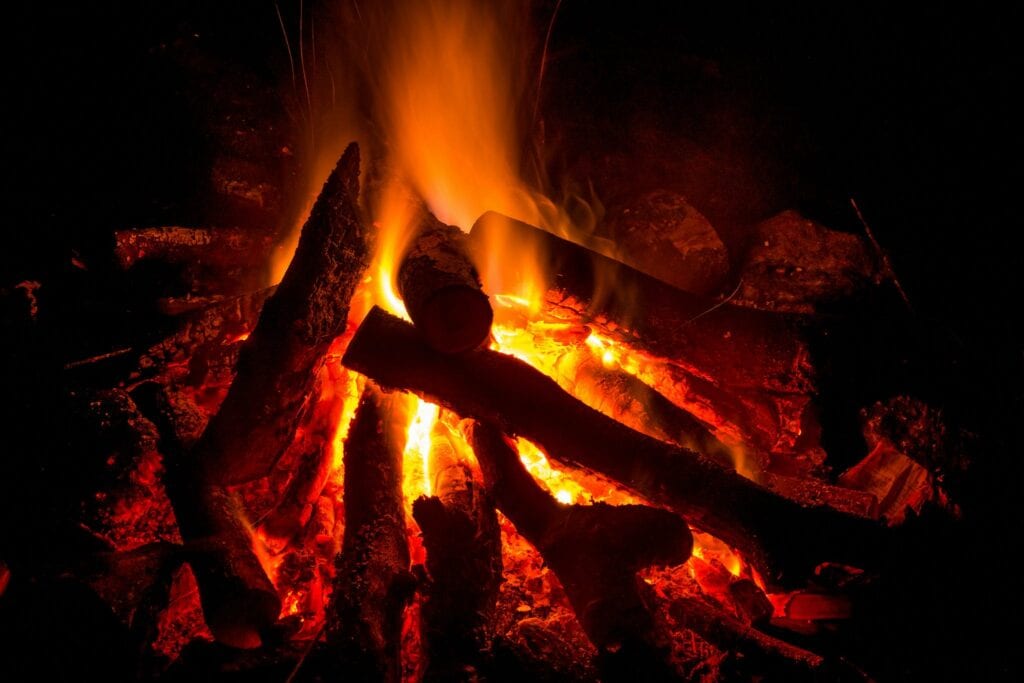
flip the tinder bundle over and allow it to catch the underside. Finally, add small twigs of dry wood and increase the wood size as the flame begins to sustain itself.
Another point worth discussing is marginal materials. After a rain or snow storm, materials are sure to be wet. So what is a solution to achieving fire with a dry hand drill set and a damp or wet tinder bundle? I recommend making the tinder bundle four to six times the size as you normally would. Also, collecting natural accelerants such as cottonwood fungus, or fat wood from a pine tree will aid you in fire production. When a cottonwood tree is dying, fungus will consume the inside of the tree and push itself out. This fungus will not emit flame. However, when a coal is placed on top of this fungus, the coal will grow to an equal size; thus making it ideal for primitive fire use.
Cottonwood fungus usually grows higher on the tree, so you will need a long stick to remove it from the tree. Break the fungus apart and crush it into a fine powder with a hammer stone or wooden mallet. Add the material to the top of your tinder bundle and begin the steps of seating your drill as mentioned above. Once the coal is placed onto the fungus you will blow the tinder into flame. With a wet nest more oxygen is needed, but the fungus will produce more heat. Eventually the tinder nest will dry out and flame will ensue.
In conclusion, primitive fire is a complex art that has lasted the test of time since the begging of our existence as a human race. Although making fire by rubbing two sticks together can be challenging, it is my hope that this article has offered helpful information and insight into a skill that truly is fundamental in understanding our early ancestors and the basic premise of practicing primitive skills. We can also argue without fire our modern species would not be as advanced as it is today. Rather brain development from increased nutrition and cooking wild foods would likely cease to exist. Indeed, the central importance of adaptation and human advancement revolves around the use and regulation of making fire.