MAKING TRADITIONAL ARROWS
Past cultures and their means of making bows and arrows have always been an interest of mine. As a young boy, I remember visiting museums throughout the West with my Grandmother. I had a deep fascination towards the Native American way of life. I always asked my Grandmother where the arrowheads and archery equipment was located. After showing me the bows, arrows, and small “bird points”, I received a well deserved lecture on how they were made and used. My Grandmother had a great appreciation towards the Native people and taught me to show the same gratitude. As years went on I remember my family and I went camping in Lone Pine California, where we fished and gathered pine cones. Indeed, these were times of pure excitement, adventure, and enjoyment. One day, after fishing in a small creek I decided to walk off the beaten path and found an amazing discovery that was sure to grasp my Grandmother’s attention.
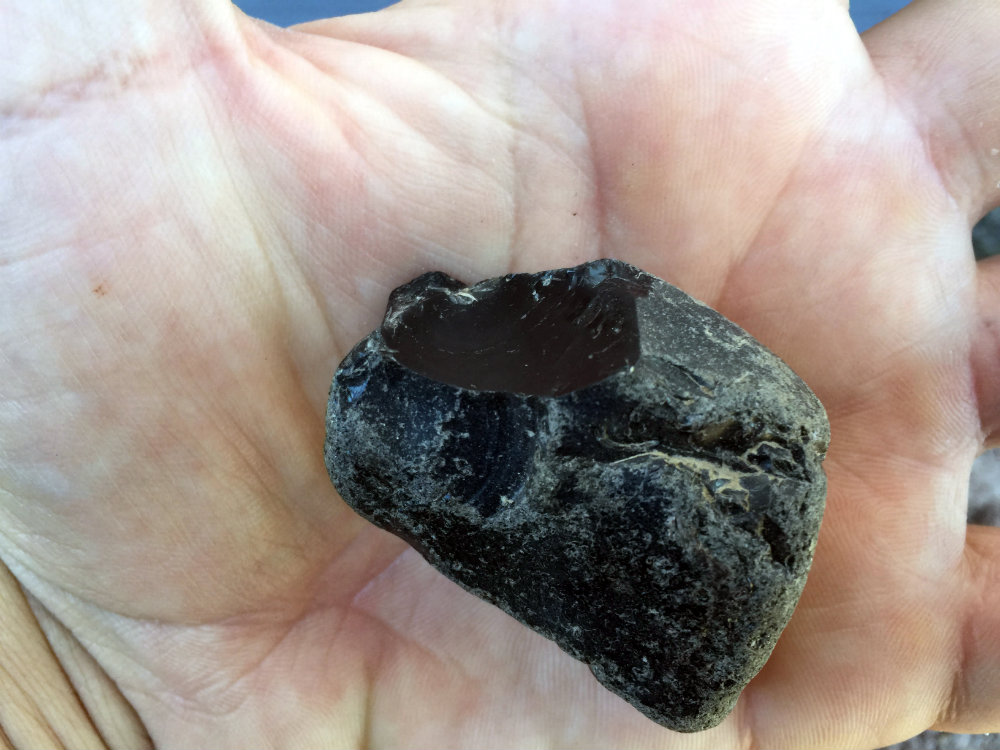
The ground was littered in jet black obsidian core that emitted a beautiful shine. When I found the obsidian I ran towards my Grandmother in pure excitement, shouting, “Look what I found!” My Grandmother walked up the road with me and discovered the obsidian I mentioned. As we examined the material she gathered a few core pieces and and started looking for chipped arrowheads. She knew the Natives who once occupied the area used the same material we were observing. Unfortunately, we did not find any points, but we had a great time collecting small obsidian core.
As time went on my Grandmother reached an age where she could no longer walk without help. However, the memories of running up the mountains and through the grass in search of obsidian will always remain with me. Back in 2010 I expressed my interest in trying to recreate some of the arrows we used to see in the museums. My grandmother encouraged me to experiment. The first arrows I made were absolutely horrible in appearance and in flight. After realizing I needed proper guidance, I decided to take basic arrow making classes, dig deeper into archaeological journals, and talk to my friends at the Malki Museum. My goals were set and I wanted to replicate the artifacts I observed. Soon enough I made five arrows, then twenty, then forty, and the number just kept growing. Now, in 2018, I have many hundreds of arrows and through trial and error, I have learned how to reproduce many of the archaeological examples I have observed and researched. In this article, I will discuss the practice of making a composite arrow.
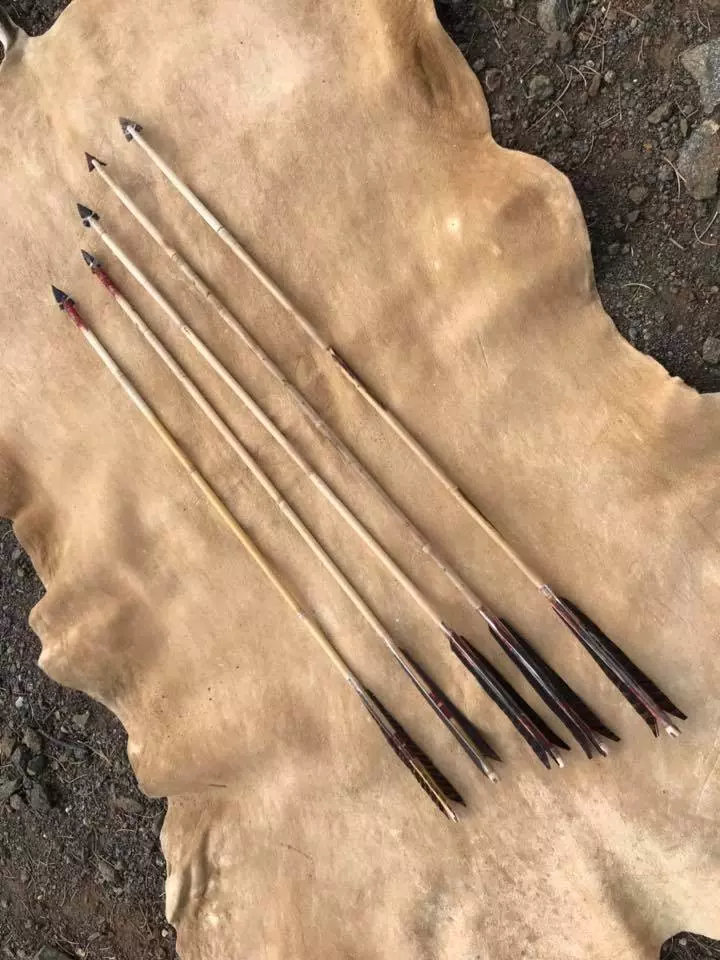
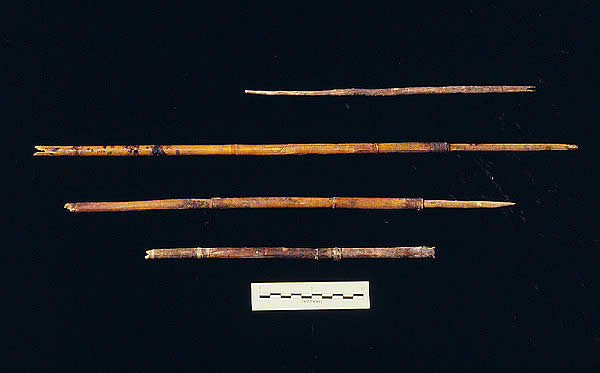
When making an arrow, you must decide on the type you want to construct. the most simplistic arrow is constructed with a single piece of wood. The most complex and advanced arrow is recognized and commonly referred to as a composite arrow. A composite arrow usually consists of three parts that are meshed together as one uniform arrow. With the exception of the stone projectile point and feathers, these parts include a main-shaft, foreshaft, and string nock. The question now becomes, What types of arrows were used in the archaeological past? Simply put, depending on the region, both were used. However, the vast majority of southwestern and coastal arrows were indeed composite constructions.
With a wood self or laminated bow, all of your arrow components should come from natural materials. My preferred shaft materials include: cane, arrow-weed, wild rose, squaw berry, and cedar. For the foreshaft I like to use arrow-weed, oak, mahogany, and creosote. When harvesting main shafts and foreshafts, I look for materials that are straight and free of mold, decay, and insect damage. Next, I will select twenty-five to thirty main shafts, and about ten sections of foreshafts. As soon as each is harvested, I tie each shafting material together. By doing so, the bundles are under constant tension, and allow the shafts to slowly release moisture from the wood, thus preventing twist and cracking.
When the shafts are dry, it’s time to start a fire and begin the process of straightening. If the shafts were bundled properly, this will not take long. Begin by straightening the foreshafts, then proceed to straighten the main-shafts. With the foreshafts, remove the outer and inner bark by scraping the material with a knife. Next, simply run each shaft over the top of the flame and heat the wood until it’s hot to the touch. Now bend the material until it becomes straight and allow the wood to cool. As far as the cane main-shaft, a similar process is applied. However, it is important to work with greater consideration and make sure the material does not overheat. Heat small sections of shafting and carefully bend until it becomes straight. Furthermore, when spinning the shaft, each node should be aligned with the rest of the shaft. After the foreshafts and main-shafts are straightened, I like to submerge each into water for about twenty seconds. In a dry desert environment, this prevents allows them to re-hydrate, thus preventing the wood from becoming too brittle.
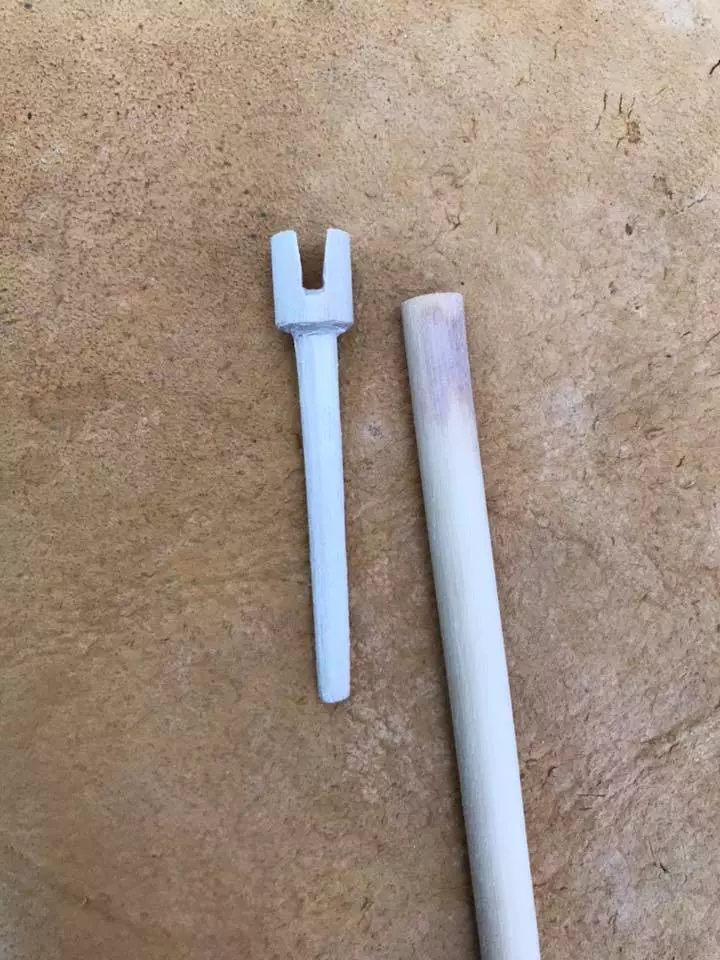
Your materials are now straight and it is time to further process your arrow. When looking at the main-shaft, you will see a larger hollow end, and a smaller hollow diameter end. The larger end will seat the foreshaft, whereas the smaller end will seat the nock. Here, I will discuss how to carve and seat a nock before discussing the foreshaft. Begin by selecting a four inch long section of forshaft material and cut or file in a notch about a quarter of an inch deep from the top. Next, about an eighth of an inch below the notch, place your knife on the wood and cut a shallow slice around the circumference of the wood. Then, using a push cut with your knife, remove wood below the slice around the entire circumference. Your goal here is to create a small “rat tail” below the knock. Finally, when the “rat tail” is made, sand it smooth, trim the tail to about three inches, and glue it into the main-shaft.
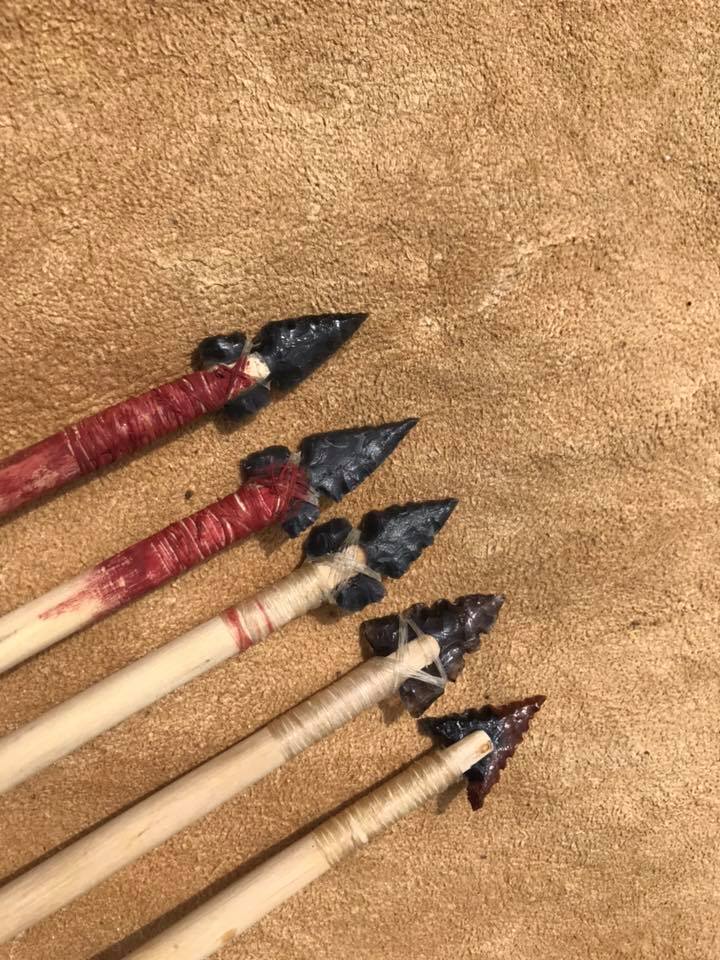
Once you have the nock glued in, it is time to work on the foreshaft. First, take an abrasive stone and abrade the exterior section of the main-shaft where the foreshaft will seat. Next, peel off thin strands of back-strap sinew, soak them in water for ten minutes, and wrap the hollowed exterior with two layers of sinew. By doing so this will add strength to hollowed end and help prevent the shaft from splitting when the arrow is fired. When the sinew is dry, select a nine inch section of wood and repeat the process of carving a “rat tail.” This time however, the “rat tail” should be about three and a half inches and friction fit inside of the main-shaft. Once you have a friction fit, on the opposite end of the “rat tail”, cut or file in a slot for the projectile point and create a slight taper towards the tip of the foreshaft where the point will sit. To complete the foreshaft, glue in your projectile point with a pine resin, and wrap it tight with wet sinew.
At this point you are ready to begin the fletching the arrow. Indeed, this is the hardest part of the process and can frustrate many beginners. However, as you keep practicing , you will begin to fully understand how this process works. Begin by, selecting three turkey feathers. All three feathers need to be either left wing or right wing–if you have left and right wing feathers on the shaft, the arrow will not fly properly. After choosing the feathers split the quill in half by poking holes into the center of the underside of the quill. Next, split the quill in half and remove the center pith with the tip of your knife. As each feather is split, examine each feather and keep in mind when you secure them onto the main-shaft, the thinner part of the quill will point towards the nock. Once the feathers are split, trim each split with your knife to about six and a half inches long. Now place your knife or scissors at the largest end or bottom of the quill and trim the feather plume back about half of an inch. Repeat the same process towards the top of the feather. Finally, trim the other two feathers identical to the one you just processed.
Below is a list of materials I use for securing the feathers to the main-shaft:
1. Thin pair of scissors.
2. Back-strap sinew.
3. White silk sewing thread.
4. Water.
5. Hide glue,
6. Sharpened stick.
7. Abrasive stone.
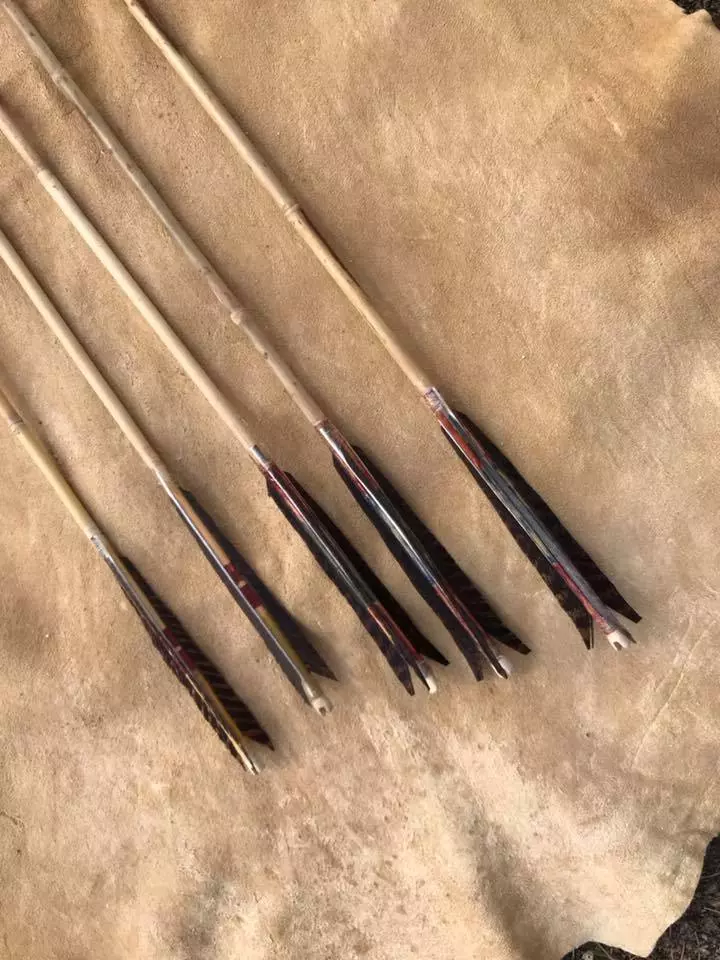
You now have all the tools needed to complete the fletching. Begin by soaking strips of sinew in water and abrading the main shaft where the feathers will sit–this allows the glue to bind on the shaft. After abrading the surface you can choose to paint your arrows or just leave them as is. I like to paint my arrows, especially the replicated ones. When the pigment is dry soak the feather quill in water, as this will expand the quill and help keep the feather straight. Next, use your sharpened stick and apply hide glue under the quill of all three feathers. Remove a thin strand of sinew from the water and place one feather on the shaft(preferably parallel to the side of the nock). Wrap the sinew around once, then add a feather, and repeat the process until all three are evenly spaced and wrapped tight. Now you will want to remove another strand of sinew and wrap the bottom quill. After securing all three feathers on the shaft, cut a long piece of sewing thread, and from the bottom sinew wrap start by wrapping the thread around the fletchings. When you reach the top of the nock tuck the thread under itself, pull it secure, and leave the arrow to dry for two days. I also recommend wetting your fingers and straightening out the feather plumes after the thread is secured. This allows the plumes to be free of any gaps and imperfections. Once dry, remove the thread and wet your fingers to smooth out the ridges of dry glue in between each feather. At this point, your arrow is complete!