MAKING POTTERY
Part One: Making pottery
When analyzing prehistoric people in the American Southwest, how do we define different cultures? Some in the general public might say through religion or ethnicity. Indeed, a conclusion of such is partly correct. However, in archaeology we go beyond the simplistic methods of identification. Rather we examine oral tradition, migration patterns, language, kinship groups, foods, architecture, and ceramics. Due to the qualitative nature of ethnographic research, anthropology has gained tremendous incite into the prehistoric past through modern descendants. For the purpose of this entry I will discuss ceramic assemblages in the American Southwest and experimental practices in recreating Prescott Culture pottery.
Long before European contact in Arizona, there were highly mobile hunter/gatherer groups recognized as the Clovis and Archaic people. Clovis people hunted large game such as mammoth, whereas mid and late archaic groups hunted medium sized game. After the Archaic period we see new groups of people emerge and are recognized in archaeology as the Hohokam, Pueblo, Sinagua, Prescott, Salado, and Mogollon cultures. All of these cultures did not just randomly appear in the archaeological record. Rather there is a gradual transition that stemmed from archaic people and patterns of migration. Whats more, each group has similarities and differences in material technologies and ideology. Some similarities involve the production of maize agriculture, the use of shell decorations, bow and arrow cross-section and style, and the utilization of pottery. Some differences include how maize was produced, how a shell decorations were assembled, and how pottery was constructed.
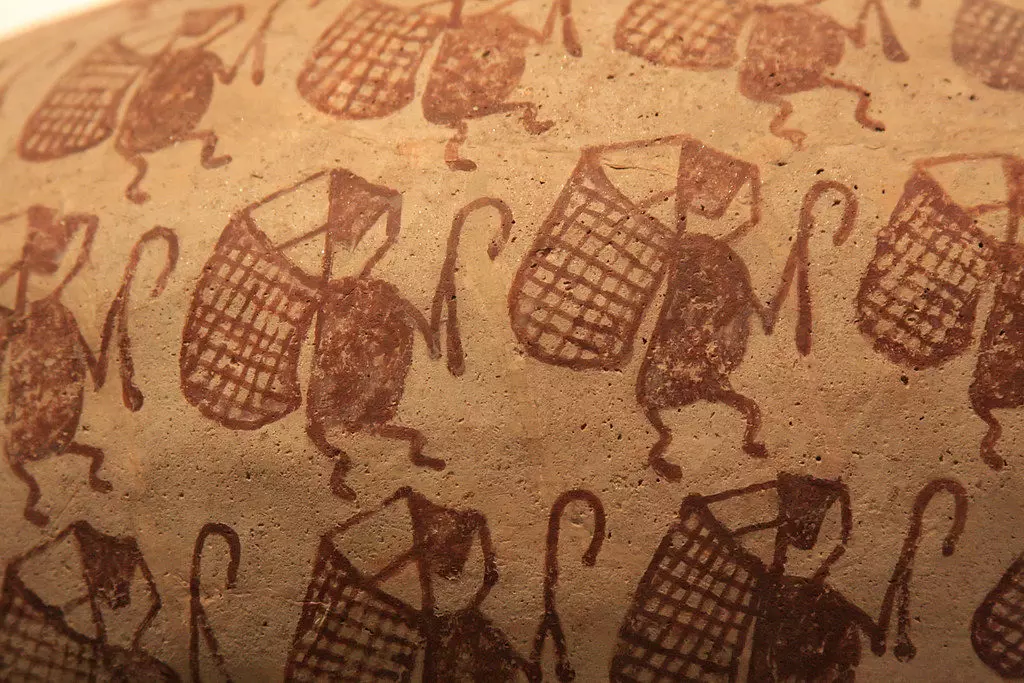
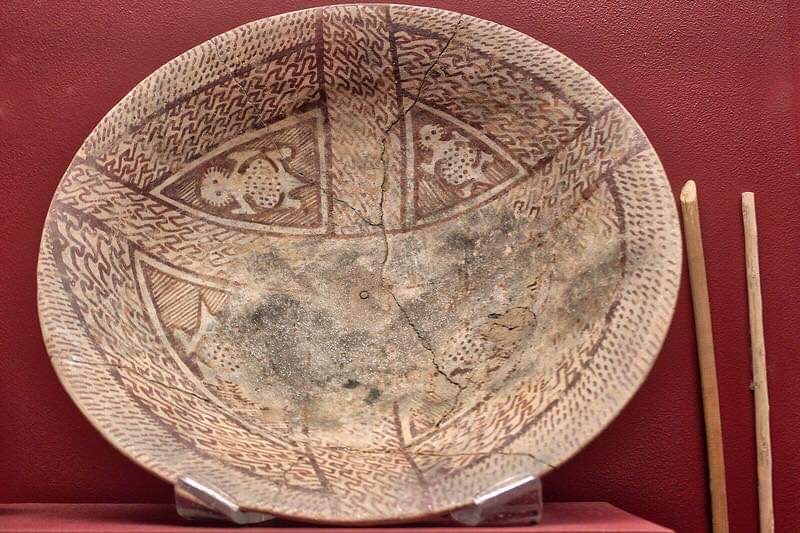
Over the past fifteen years I have had the opportunity to observe and handle hundreds of pots from all over the world that sit in museums, private collections, and storage facilities. Many of these ceramics are masterfully crafted and show significant wear from daily use and deterioration. While I have seen Mayan vessels that are absolutely stunning and Mimbres bowls that offer a glimpse into prehistoric daily activities, the most intriguing pots come from the early Hohokam Colonial period. These red-on-buff vessels show interior designs of hatched animals, design ticking, shallow scored exteriors, and trailing exterior lines. In addition, some elements of Hohokam vessels include Mesoamerican influence through iconography and ideology. Indeed, each pot offers a further understanding into how connected past people were to each other in regions far away.

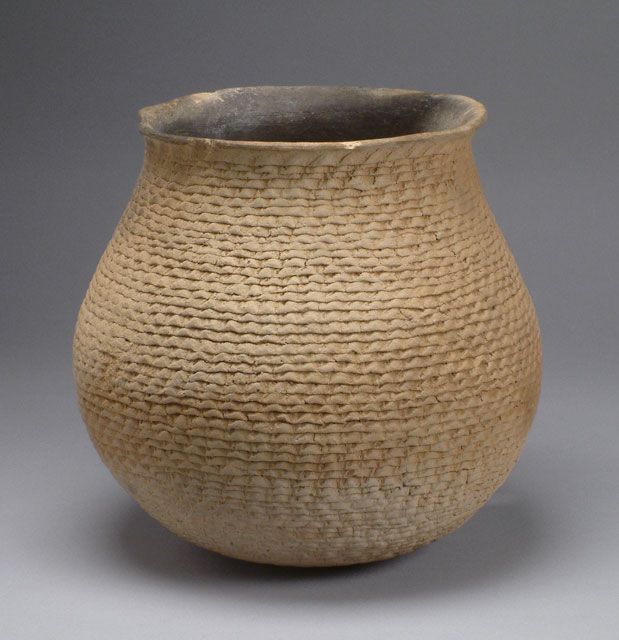
In the Hohokam region pottery was created using a paddle and anvil technique. This method of construction is quite different in Puebloan groups where pottery was manufactured using a coil and scrape method. Depending on the vessel observed, the average person would not likely be able to notice the difference between a smooth surface jar made with a paddle and anvil technique compared to a coiled and scraped pot. This is because the potter made sure the vessel was held together with absolute seamless perfection. However, when observing a corrugated Puebloan jar from 1000A.D and a Sacaton Period Hohokam jar, there are clear observable differences. These differences do not alter the integrity or basic functionality of both vessel styles.
As we shift gears on how to make pottery, it is worth mentioning that every modern potter has a different style of production and manufacturing. If a person makes pottery using a paddle and anvil technique, they might use a paddle and anvil throughout the entire construction process. At the same time, another person might employ additional tools such as gourd scrapers. I like to mix things up and combine the paddle and anvil method with coiling and scraping. This means when constructing a pot, I use both southwestern methods of manufacturing with the goal of producing a single vessel. For your convenience, here is a list of tools I recommend using for making pottery.
– pookie (cloth or fired clay)
– wood paddle and stone anvil
– gourd scrapers- smoothing stones
– sharp flakes of obsidian or other trimming tool
The first thing you need to do is gather clay and process it. My recommendation here is getting in contact with a local potter or museum and inquire about residual and primary clay sources in your area. Many residual sources are already tempered and to not require the addition of crushed rock and sand. Keep in mind however, potters keep residual sources quite secretive from the general public—due to modern cultural negligence I can’t blame them. Also worth mentioning is each clay body can differ in temper. One of the clay bodies I gather from is tempered with a phyllite composition. About 3 miles away there is another source tempered with sand and heavy amounts of mica. Both clay sources are mountainous and sit 5,000ft. above sea level. Many potters will tell you clay from the mountains are poor quality compared to the clay found at lower elevations. While mountainous clay are quite sandy and tend to crack when too much or too little moisture is applied, you can drastically improve the quality by using alternative processing methods such as slurrying.
Some potters will gather the raw clay in a bucket and begin to tunk or crush the clay with a hammer stone. They sift the clay in a mesh sifter or a basket and add water to create a paste. While this method will work, I recommend slurrying all mountainous clays. As mentioned briefly in the previous paragraph, this alternative processing method improves the quality of mountainous clays quite drastically. Once you have about 5 gallons of clay crushed and sifted, fill a 5 gallon bucket with about 4 gallons of water. Add the sifted clay to the water and stir the mixture with a stick. After stirring for about 5 minutes, pour the mixture into a large pillow case and tie the top secure. Now dig a pit into the earth and place the pillow case inside of the hole with wood poles covering the top. At this point you want to wait about 8 days to allow the water to fully hydrate the clay.
After 8 days you will notice the clay is hydrated and lumped into a single brick. Simply remove the clay, place it into a black trash bag and allow it to age for about 2 additional weeks. When aged you will notice the clay is not too wet but also not too dry—it should feel like Play-Doh that is beginning to dry. Now place the clay on a solid flat surface and wedge the entire brick for about 30 minutes. Wedging removes any excessive moisture, makes it more pliable, and creates a uniform consistency. At this point the fun part begins—you are ready to make the pot.
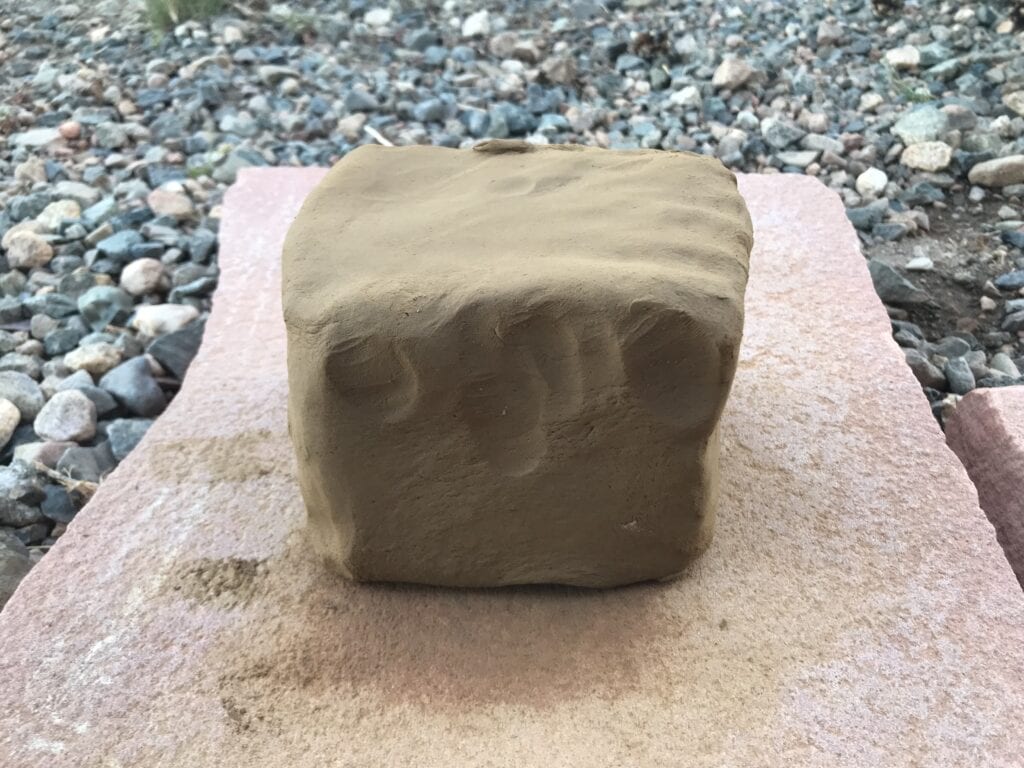

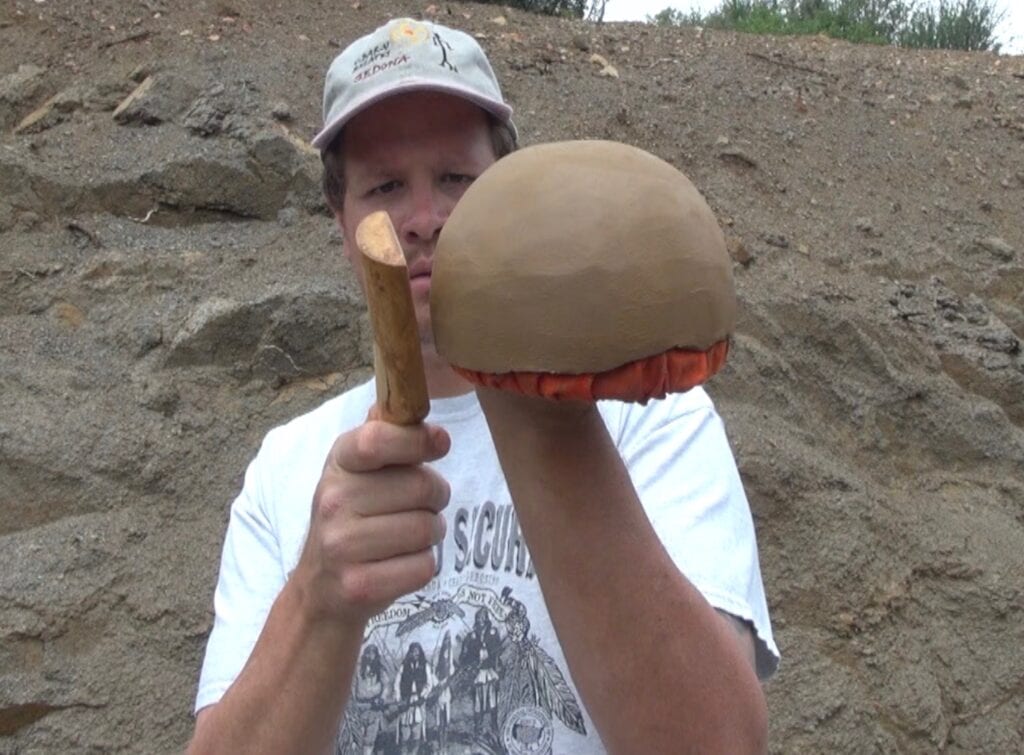
Begin by placing a damp cotton cloth around a ceramic bowl that has already been fired—this is known as a form pot. Next take a hockey puck sized clump of clay (size can vary depending on the pot being made) and flatten it into a thick tortilla like patty. Place the flattened clay on top of the form pot and make sure it is centered while checking the edges for any low or sagging spots. If a sagging spot is present I recommend trimming the clay for a more symmetrical shape. Now wet the paddle and thin the base from the center point to the edges by smacking the clay with modest force. The next steps are to add coils to the clay and continue to build the walls of your pot.
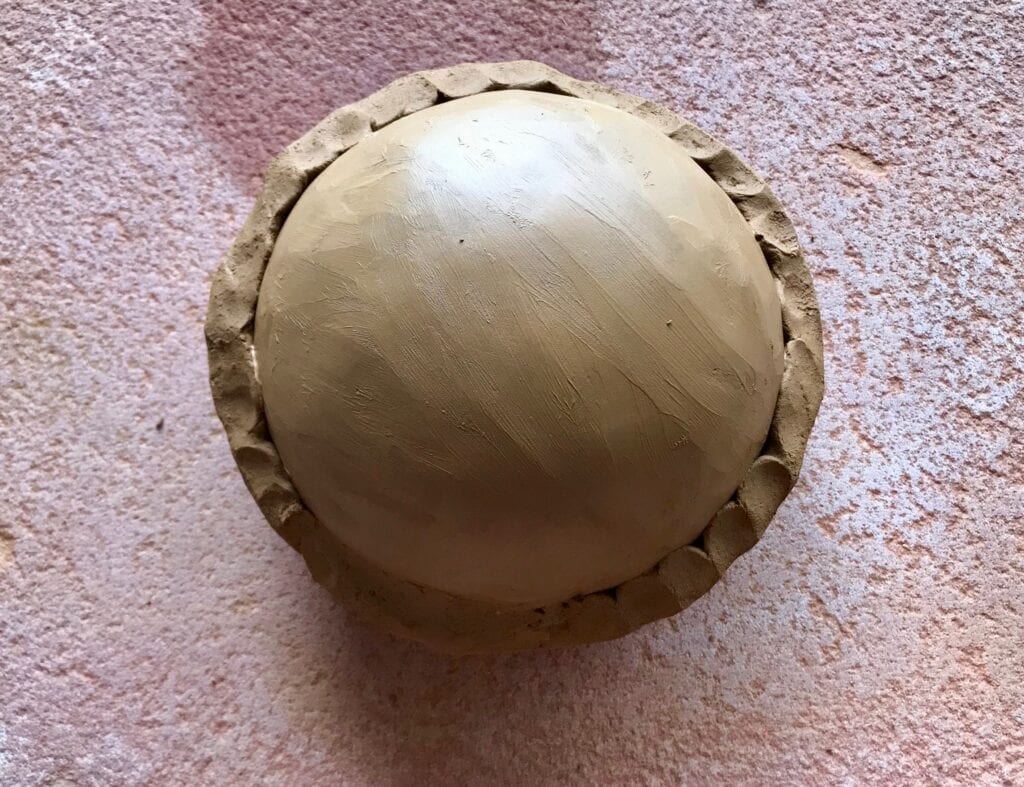
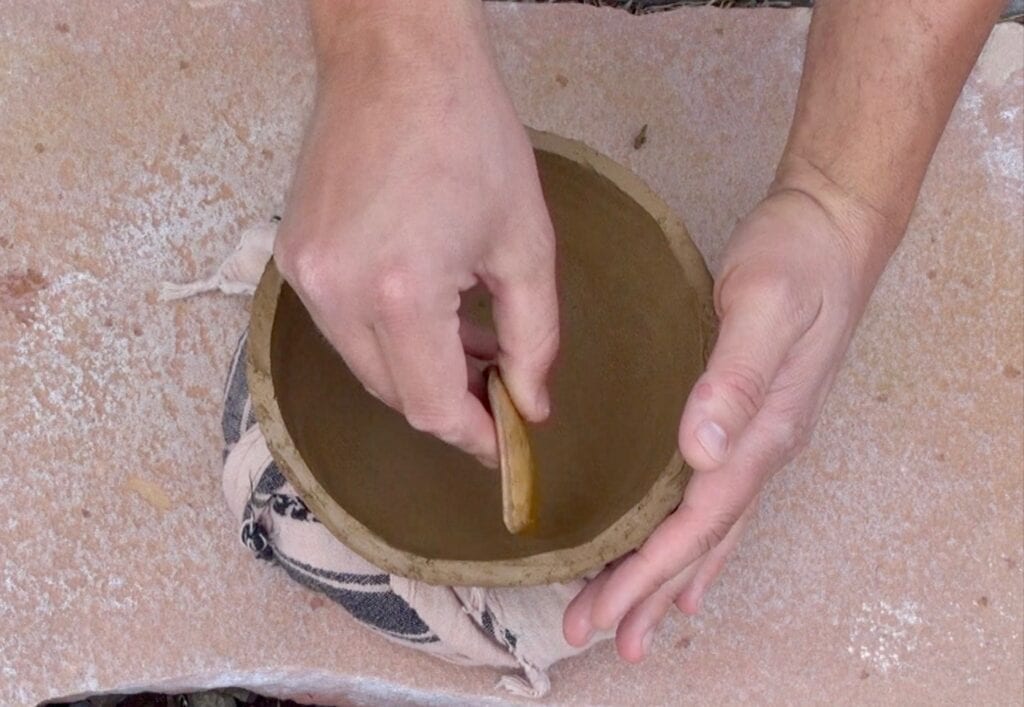
Pinch off about a golf ball size amount of clay and roll it between your hands as if you are forming a snake. Place the coil on the edge of where you trimmed (the wall) and smear it into the clay body. After you coil around the entire circumference, wet the paddle and thin the coil. As you paddle, notice the clay is pushing itself down towards the rim of your form pot. Essentially, you are building the walls from the outside of your new vessel. After you finish paddling, trim the low spots, wet your smoothing stone and slide it across all outer parts of the clay. Smoothing the vessel will further help bond the clay together, rid of potential air pockets, and smooth any rough spots. Repeat the process of coiling, paddling, smoothing, and trimming until you reach the bottom of your form pot. Depending on how much moisture was applied and the level of humidity in your environment, it is essential to let the pot sit for about 15 to 35 minutes. This will allow the clay to firm up and hold its shape when removing it away from the form pot.
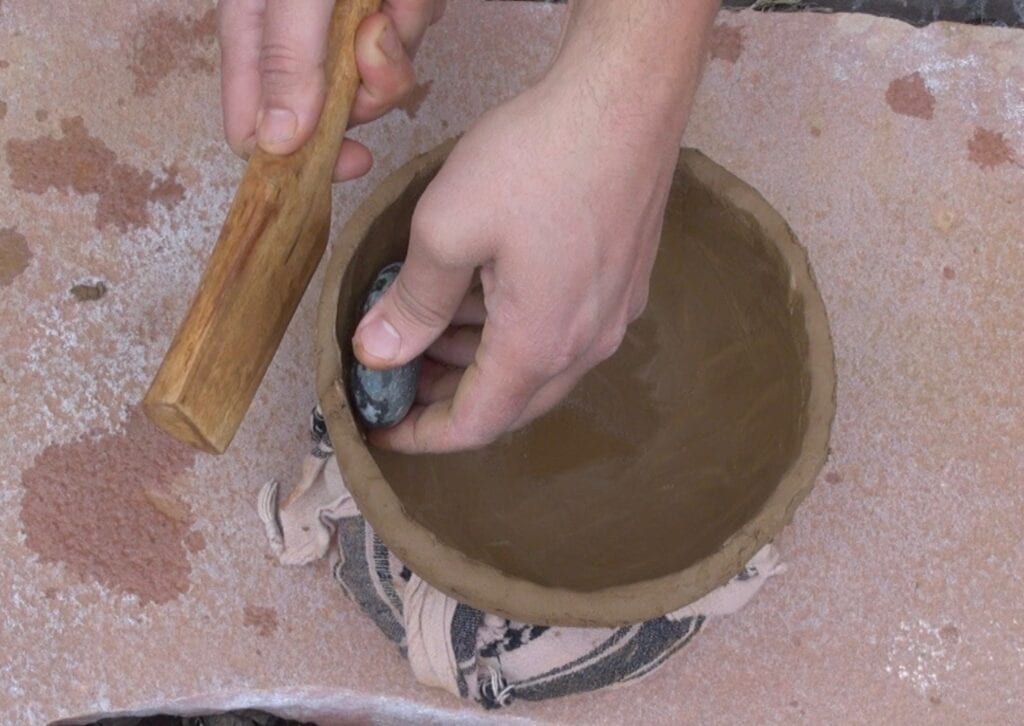
Here is where things get tricky for the beginner. While supporting the bottom of the clay body, remove the form pot and damp cloth from your freshly paddled clay. Place the newly worked pot on your pookie and pinch the rim to a point around the entire circumference. Now make a few coils that are thicker than the rim and place them on the top of the pinched surface. Smear the base of each coil on the inside and outside of pot—the clay should adhere to the vessel wall. Use your gourd scraper to smooth out the coil seams while using your hand to support opposite side of the wall. Next hold your anvil on the inside of the vessel and paddle the clay up with your opposite hand—this will thin the coil and blend it into the vessel nicely. After couple of passes of paddling around the pot, wet your smoothing stone and swipe the inside and outside walls. Just like before, you will likely see the rim is uneven and mountainous. Simply trim the high spots and repeat the previous steps starting with pinching the rim.
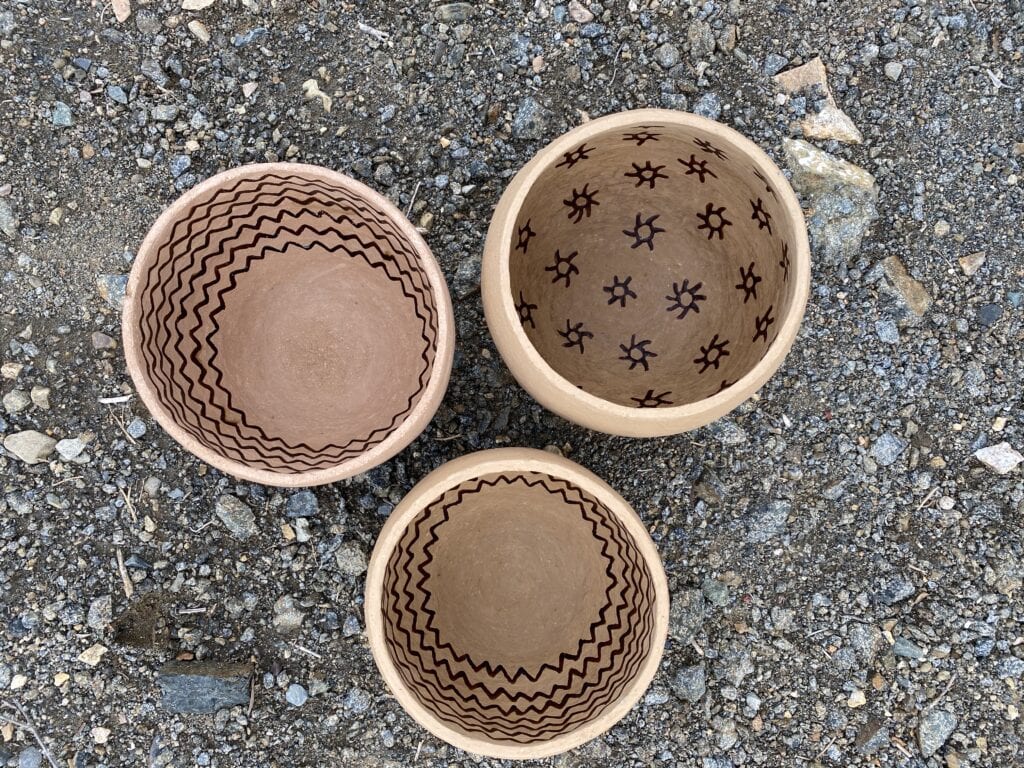
Once you have a desired vessel size and shape, it’s time to finish the pot and prepare it for firing. Examine the pot’s rim and make sure it’s even. If you see high or low spots simply remove material or fill in the valleys with additional clay. Once finished, store the pot in cool shaded place and allow it to fully dry—depending on your location this can take up to a month. After the pot is dry you can choose to keep in its original appearance or polish and paint it. When polishing a pot, use a smooth river stone and buff the surface. Painting the pot brings the vessel to life while also displaying a high sense of creativity and artistry. Depending on how you want to fire the vessel will determine the paint you use. When firing in oxidation iron oxides such as hematite works well. With buff clays hematite will fire deep red to purple in color. However, when firing in reduction bee-weed, sunflower, and mustard extract offers a rich black color and adheres to the pot much better.

Part Two: Firing pottery
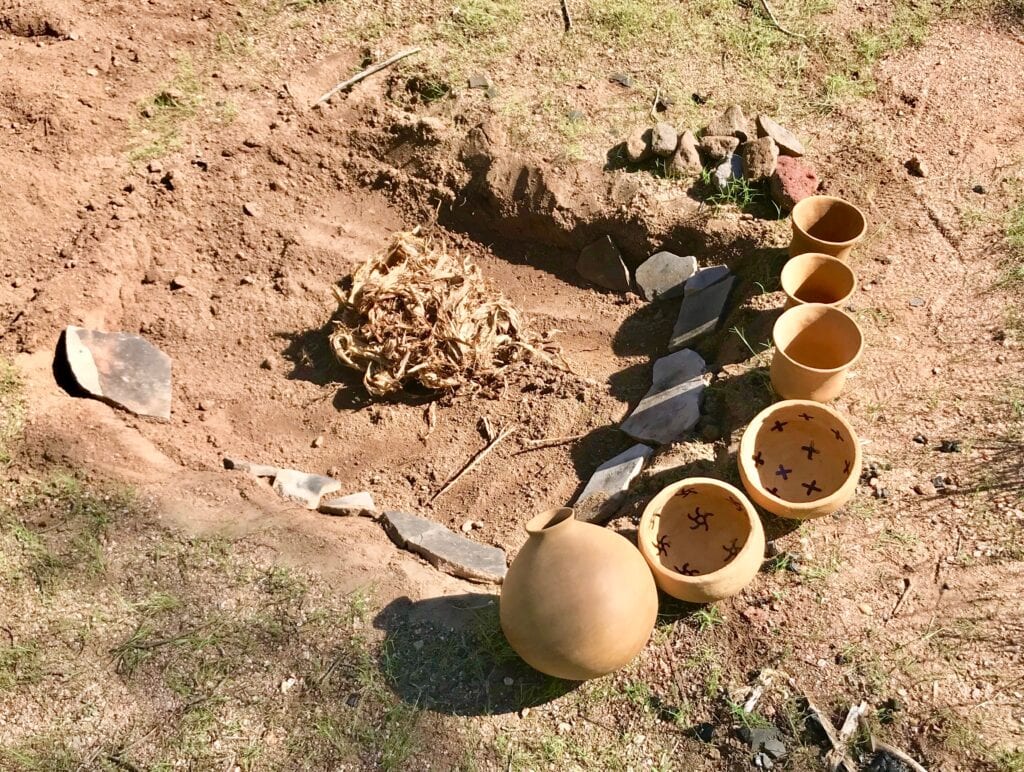
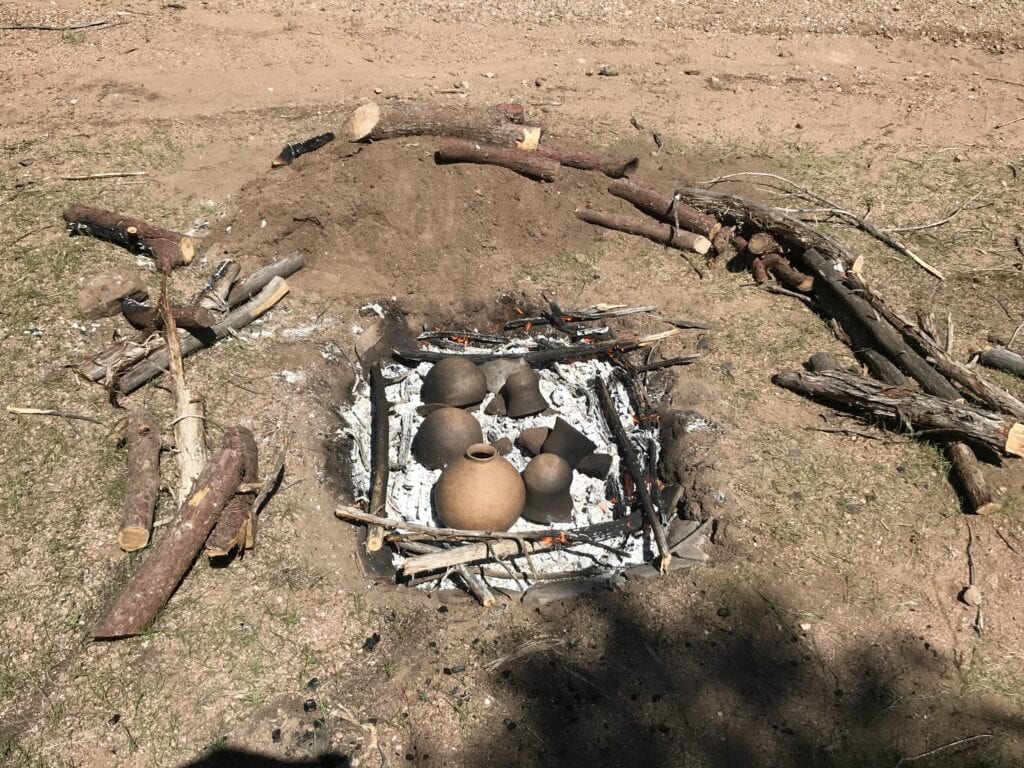
Clay is one of the most malleable materials on the planet, but when exposed to extreme heat it chemically changes into a permanent ceramic. This vitrification process is what makes pottery valuable to cook, disinfect water, and store food in. Here we will dive into the complexity of firing pottery. Begin by building a preliminary fire somewhere fire safe. This initial fire’s purpose is to slowly heat the pots and build a hot bed of coals which will become the base of the final fire. As your preliminary fire burns down place volcanic rocks called kiln furniture on top the coals. Once your pots are hot to the touch, sit them on top of the volcanic stones and heat them up even more by placing small pieces of wood around the pots. As the pots turn black flick small droplets of water on each vessel—if the water sizzles off the surface your pottery is ready to be fired.
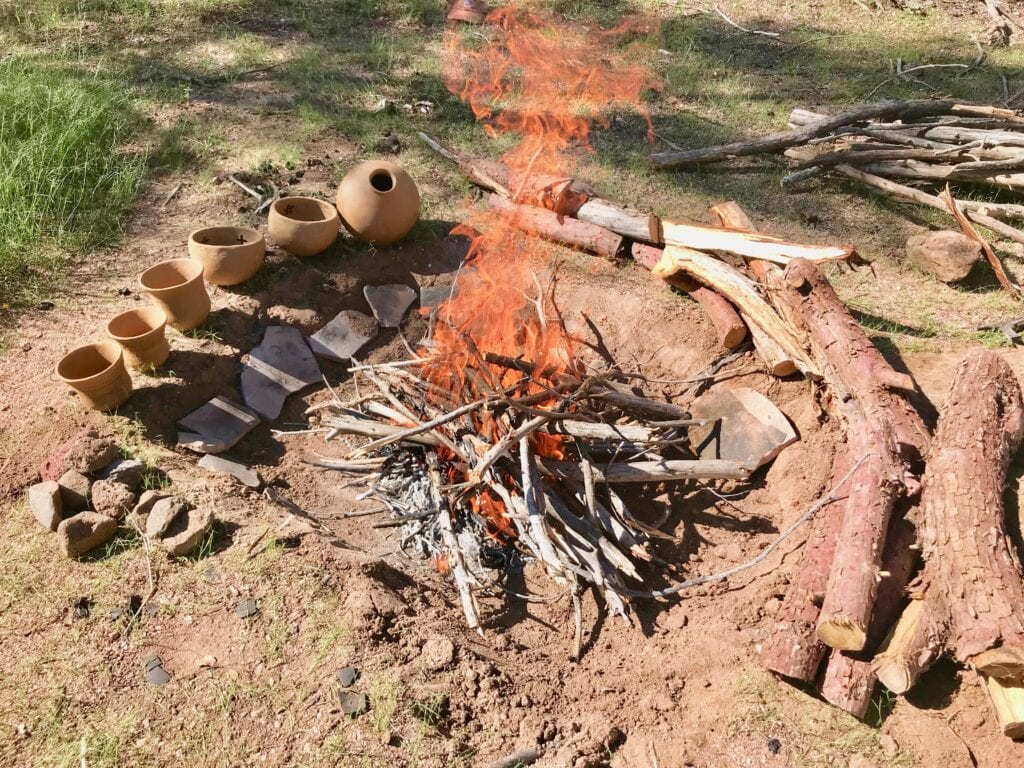
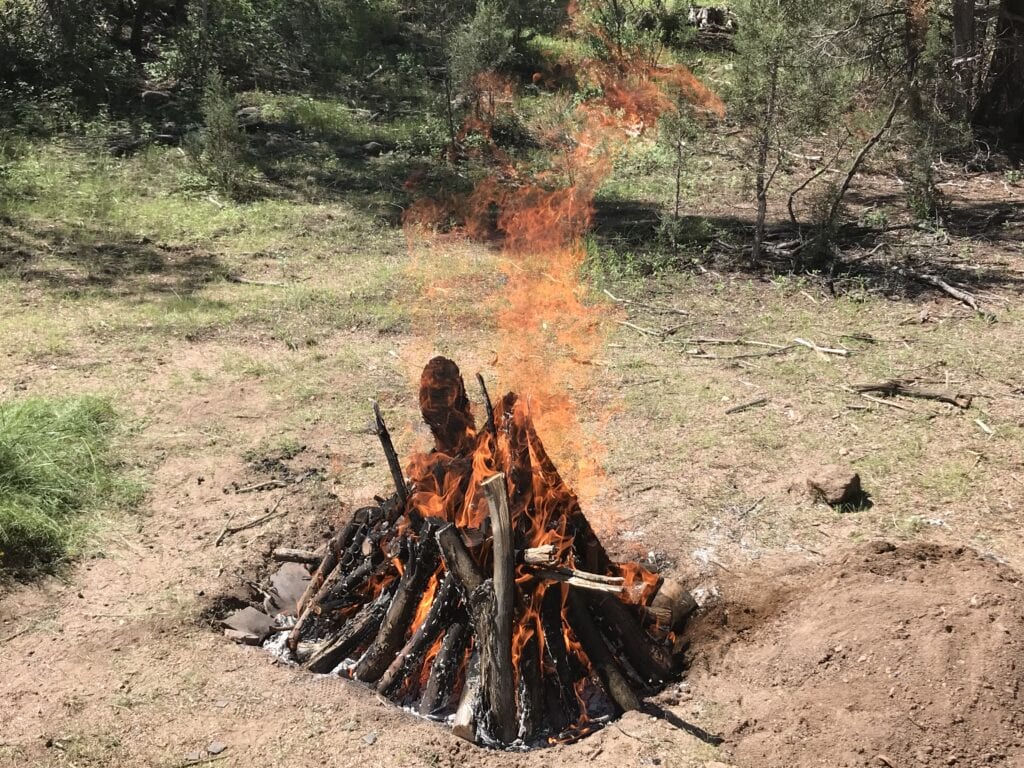
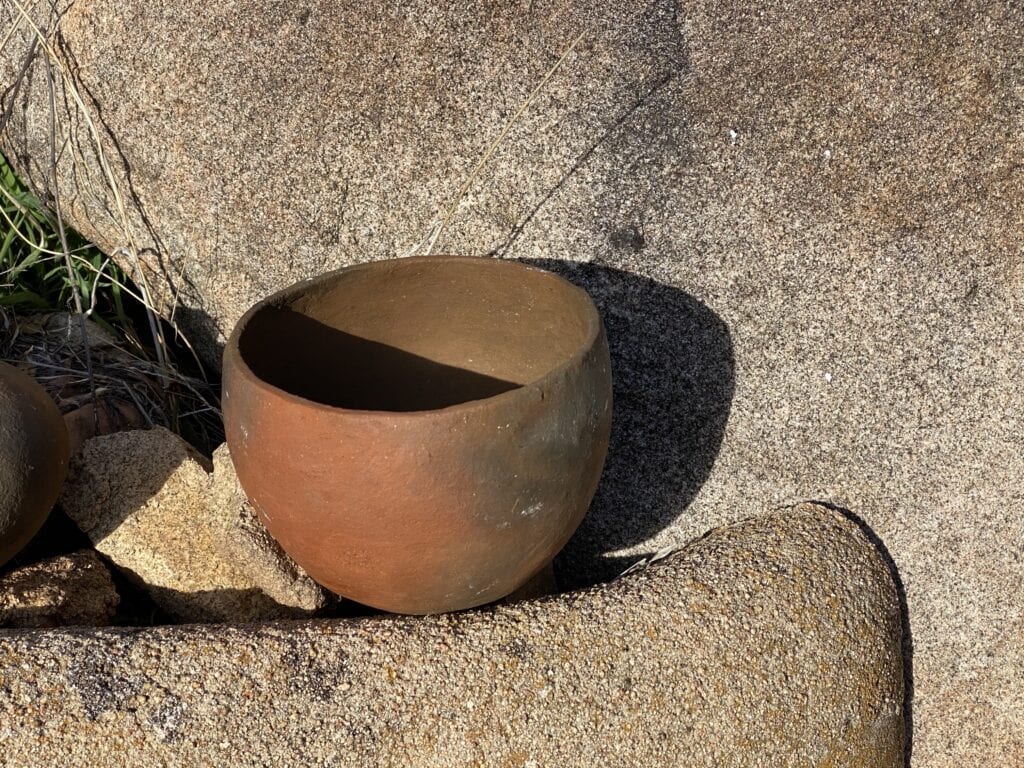
Oxidation firing is where oxygen is accessible throughout the kiln area while the fire burns down. Much like making a pot oxidation firing requires a deep understanding of how to work with and manipulate clay. Picking up from the previous paragraph, you are now ready to build your main fire and turn the pots into a fire hardened ceramic. Stack wood around the pots tightly using smaller sticks along the interior and larger wrist size branches on the outside—the stacked wood should surround the pots in a conical formation. As the wood burns down and peak temperatures are reached to approximately 900°F, the iron in the clay oxidizes to a reddish orange color. Allow the coals to burn down to ash before pulling the pots out of the fire. Once the pots are completely cooled down, rinse the ash from the vessel and applaud yourself for a successful oxidation firing.
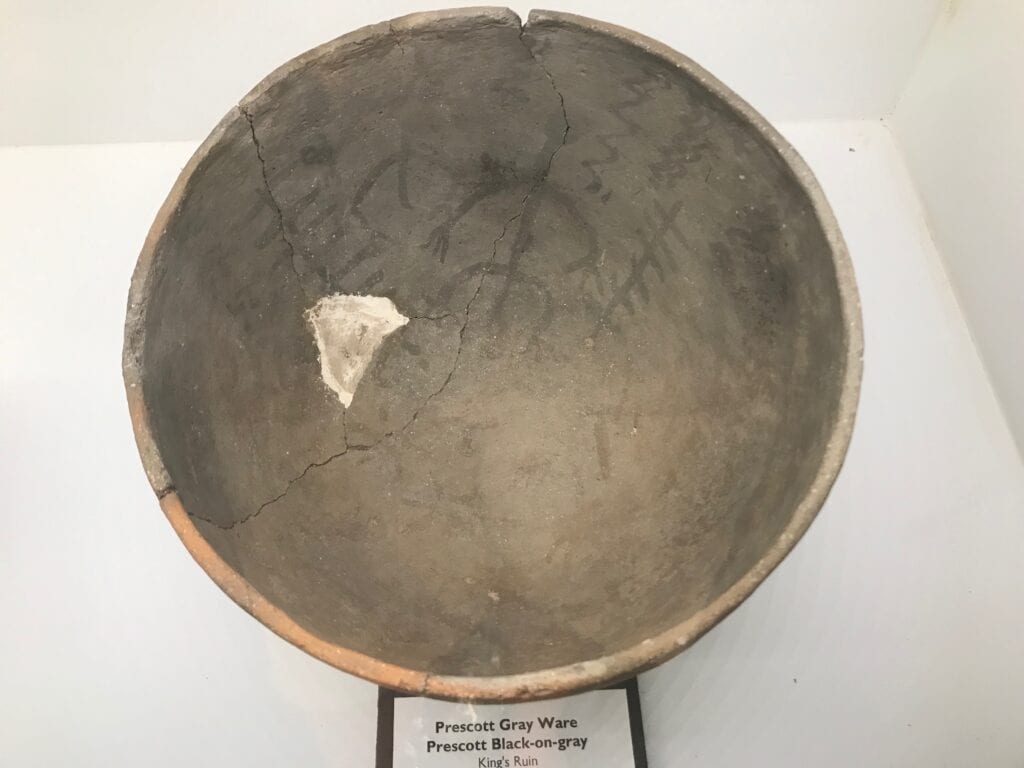
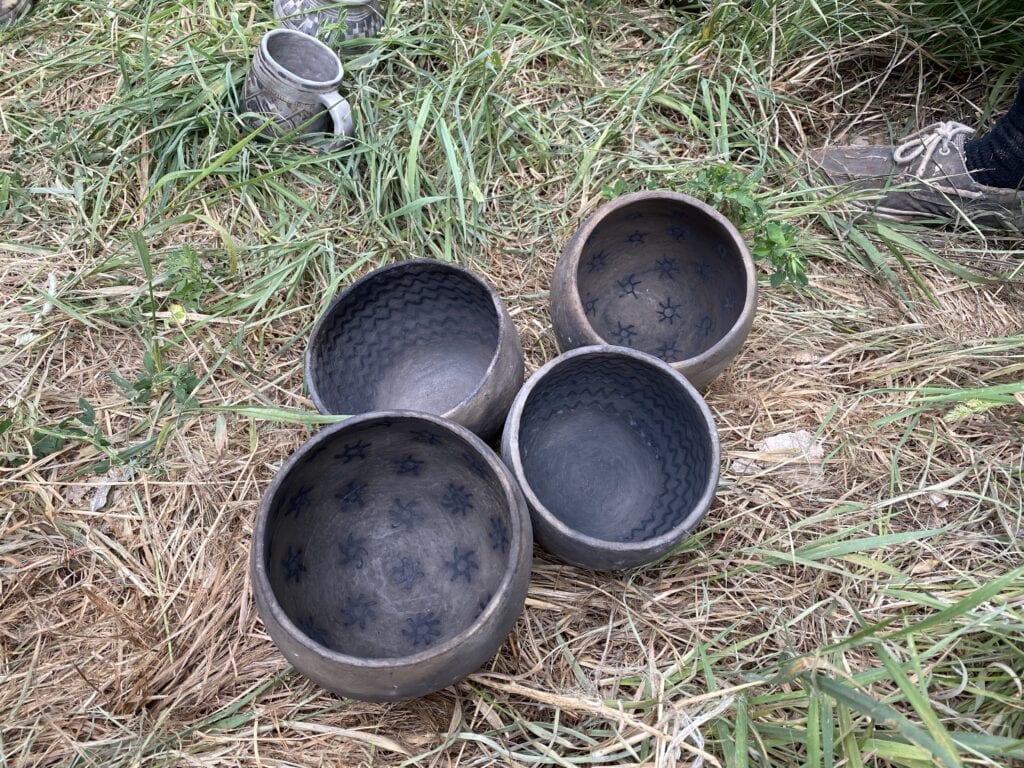
Compared to firing pottery in oxidation, methods of reduction are far more complex. This firing style is usually employed when dealing with organic painted ware. Organic paints are made by boiling and rendering various plants such as sunflower, mustards, and rocky mountain bee plant into a syrup. When firing in reduction dig a one foot deep pit into the earth. Once the preliminary fire is complete, take long poles about the diameter of a man’s ankle and lay them over the top of your kiln with about an 8 inch gap in between each pole. Next, stack wood about 1 foot high on top of the long poles in a log-cabin type configuration around the edges of the pit. Allow the fire to consume all of the wood and when left with only a hot bed of coals, bury the kiln with the dry sand you used to dig the pit. The next day, retrieve your pots and if they are fired correctly the paint is able to burn off but will leave a carbon stain which gives a black color on a grey background.
Through time and space pottery was an important aspect of the traditional prehistoric lifestyle. Across the American Southwest we see many different shapes of pottery that served a necessity for daily living. Whether the pot was used for religious practices or as a utility, we understand the tradition of making pottery lasted until we lose track of many prehistoric cultures around 1450 A.D. Furthermore, it is critical for the anthropologist to examine the abstract nature and methodology of creating, producing, and distributing ceramics. Each sherd tells a story of where the pot was produced and how it was constructed. Although in modern day we can apply scientific methods of identification to gain information from a single pot sherd, there is still a mystery behind some of the abstract designs displayed on pottery across the American Southwest. Indeed, each abstract symbol keeps us employed in a scientific field that is constantly growing and changing. Finally, in closing this article we want to encourage you, the reader to experiment with making ceramics. Remember each pot is a learning curve. In the beginning frustration will set in. However, after trial and error you will become accomplished in a skill that is still practiced by decedents of prehistoric people.
For more information on making pottery visit:
www.PrimitiveLifeways.com
Special thanks to John Olsen for teaching us the ways of Puebloan style pottery
Authors,
Jeff Martin
Kiowa Sage