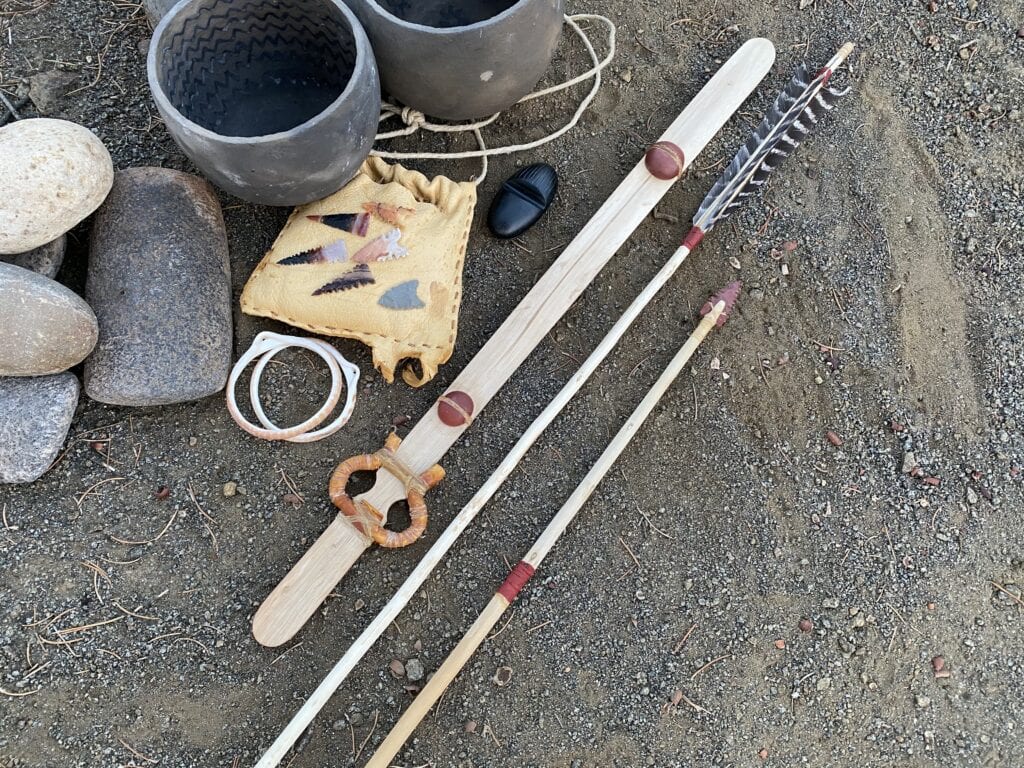
MAKING THE SINEW BACKED BOW
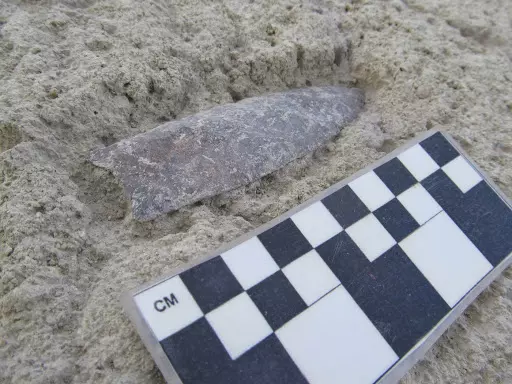
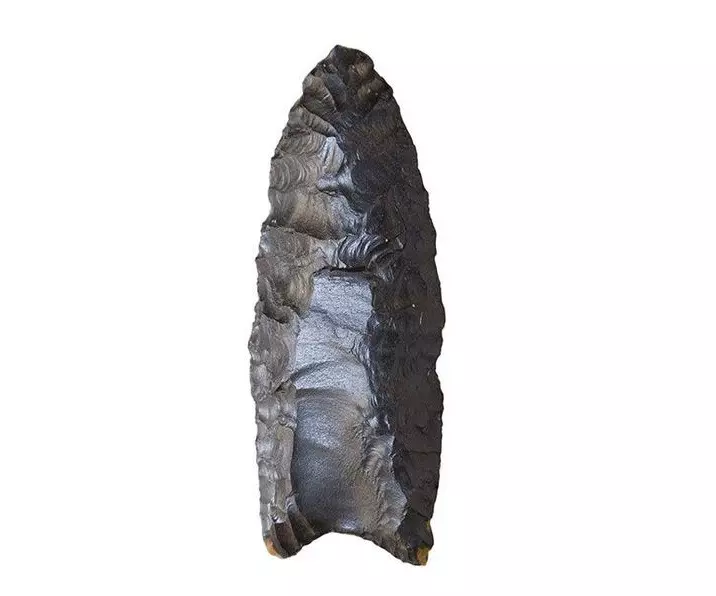
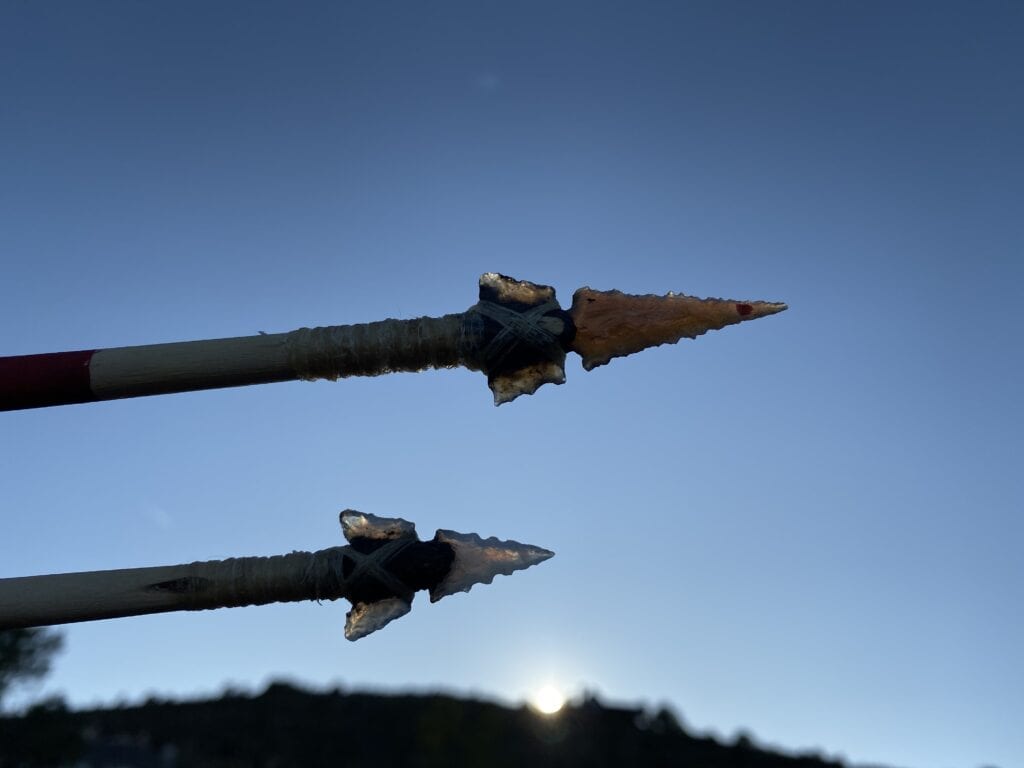
When prehistoric peoples crossed the Bering Strait they discovered lands very rich in resources. Water was plentiful, vegetation was diverse, and wild game moved more slowly and yielded heavy amounts of meat. Some of the first people that crossed the Bering Strait and eventually made their way into present day America were nomadic hunters and gatherers. They constructed highly complex chipped-stone projectile points, commonly known as Clovis points. Today some of the finest flint knappers will tell you how difficult the Clovis point can be to re-manufacture. The question arises, “How were they used?” Scientific hypothesis suggests Clovis people hafted the point onto a wooden shaft and used it in combination with the atlatl. This hunting system has now become the atlatl and dart. When the atlatl and dart was used for hunting game such as mammoth, hunters likely surrounded the animal and launched multiple darts into various parts of the body. This would eventually bring the animal close to death, and then the hunters would finalize the kill.
Now, fast forward thousands of years later and observe the transition into a time where southwestern people incorporated agriculture, while people in other regions were still mobile and lived in semi-permanent earthen or grass thatched structures. By this time, the mammoth was well extinct, and game such as deer, antelope, elk, and rabbits were pursued. The question becomes, “What did people in the post archaic period hunt with?” In addition to the atlatl and dart, items such as traps, rabbit sticks, clubs, and the bow and arrow became highly developed mechanisms to secure wild game of various sizes.
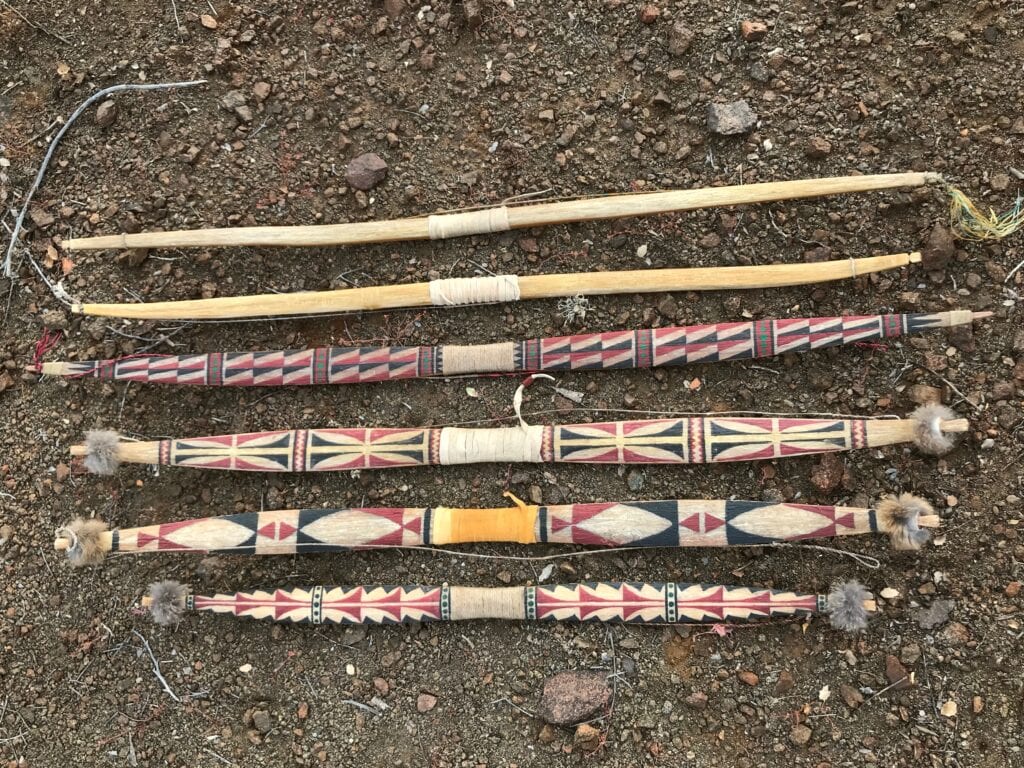
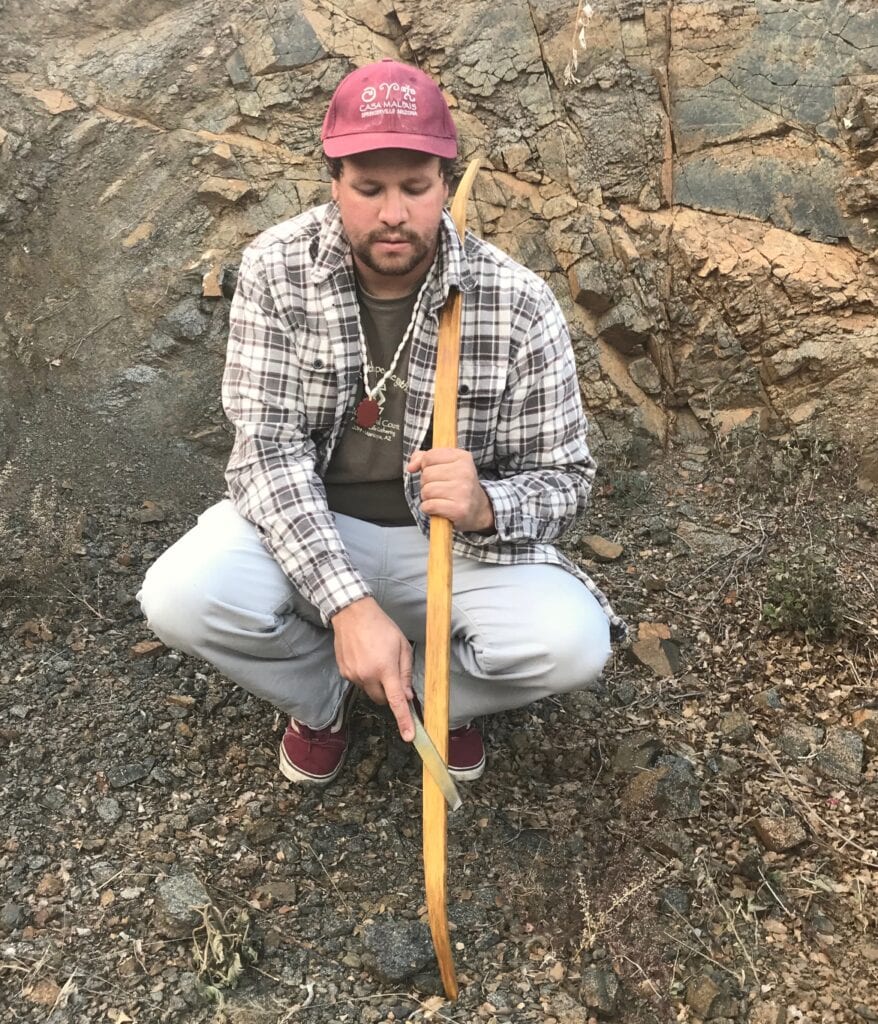
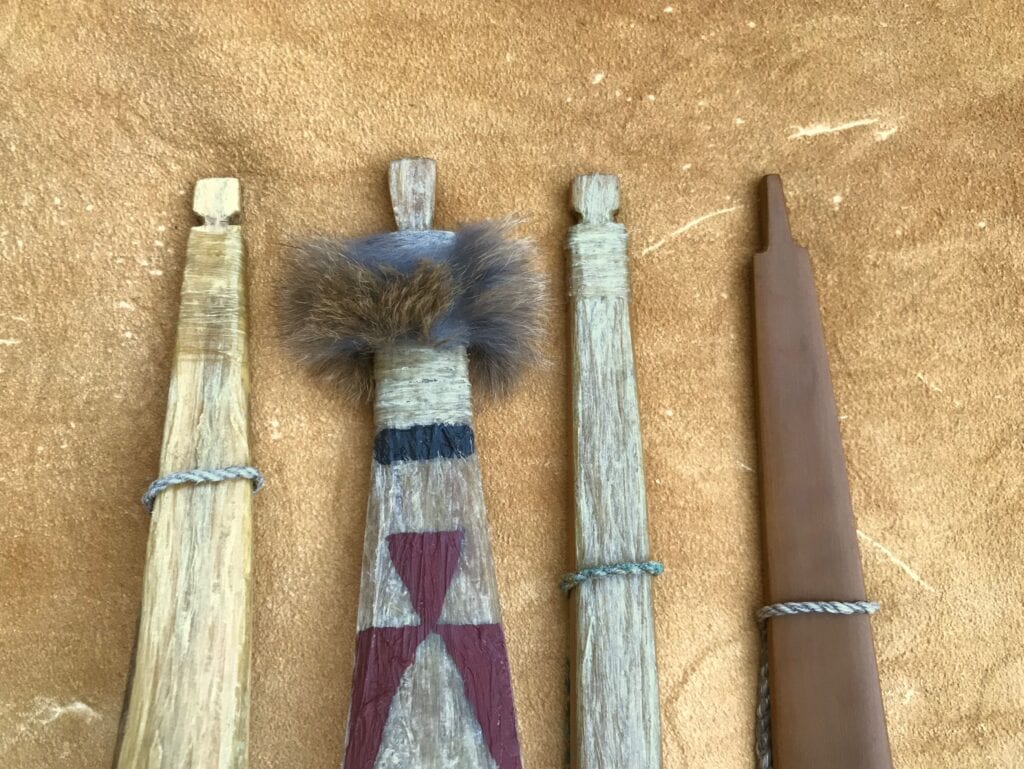
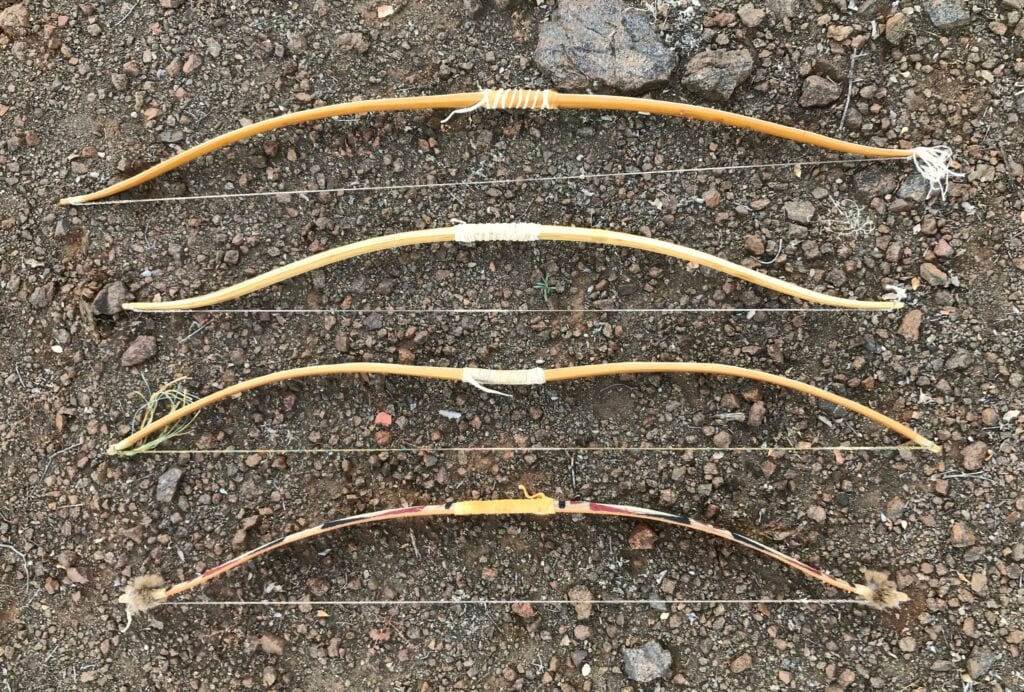
If there is one hunting tool that really stands out in prehistoric and historic times, it is indeed the bow and arrow. Prehistoric southwestern cultures such as the ancestral Pueblo, Sinagua, Mogollgen, Hohokam, Salado, and The Prescott Culture, manufactured a bow that is round, or semi-round in cross-section. While some in archaeology will argue these bows are not very efficient, and were likely used primarily for garden hunting, I do not believe this is the case for all cultures. In fact, recent archaeological evidence and experimentation suggests otherwise. Justin Parks, who wrote his thesis on manufacturing the prehistoric bow and arrow, argues the prehistoric bow was not just used in gardens, but they also served as a mechanism for hunting large game. After shooting his replicated bows, I have reached the conclusion that the prehistoric round cross-section bow carries enough speed and energy to kill larger sized game such as deer and sheep. Moreover, when comparing Justin’s replications, his bows are comparable to the historical double curved bow.
As far as historical bows, these are incredibly advanced mechanisms that stem from the earlier prehistoric models. It is my belief that historical examples slowly evolved from the prehistoric bow. Furthermore, I believe as agriculture and food became secure, craftspeople had time to focus on art and bettering their technologies. Although a separate topic for a different article, a prime example of this is displayed in Hohokam shell jewelry. We see during the archaic period shell jewelry was crude and quite basic. However, as time went by and Hohokam people made a strong presence, shell jewelry becomes more elaborate and complex. Indeed, this is the case with the bow and arrow. In this article, I want to discuss how to make one of the most advanced bows Native people developed; the sinew-laminated bow.
It is very important to understand that sinew-laminated bows are extremely complex and take years to fully grasp. Keep in mind that when making such a bow you will likely have failures. This is ok! When I first started experimenting with the sinew- laminated bow I also experienced failures. Once I made my eighth sinew bow, I figured out what worked and what did not. In addition, there are many different bow shapes and designs. Each design and style operates differently, some designs are far more complex than others. The purpose of this article is to discuss how to make a moderately difficult bow. I owe much gratitude to my mentor in bow making, Mark Swanson. Mark is an artist, firearms engraver, and master bow maker who has made hundreds of different bows since 1979. Mark is especially known for his understanding and re-pioneering of shooting a bow Ishi style.

First in making a bow, when selecting a stave, you want to choose a healthy tree with straight grain and minimal knots. Observe the tree and make sure the bark is straight and no damage is present. If everything looks ideal, harvest the log and seal the ends with glue or wax so the wood does not crack. Once sealed, the wood must fully dry before it is worked. Depending on climatic conditions, drying times can last from one to two years.
Environmental conditions can impact wood in different ways. Wood such as yew benefits in a wet climate. However, exposed to the dry conditions of a desert environment, yew can become very brittle and dangerous. In fact, many bows exposed to extreme dry and warm conditions break down quite fast. One way to combat dry conditions is to control the humidity when the bow is not in use. This can be done by running a humidifier in a room or storing it close to a stream. The question now becomes: “Is there a wood that can handle semi-dry and humid conditions?” Absolutely! In my experimentations and practices, I have found woods such as osage orange and hickory to be very resilient in most regions.
Equally important to mention is how climate impacts sinew. If conditions are dry and hot, a sinew lamination can over heat and become soft. As a result, the bow’s tiller can change and the chances of de-lamination increases. If conditions are too wet, a somewhat similar reaction can occur. The lamination becomes wet and soft, thus negatively impacting the bow’s tiller. About now you may be thinking, “Adding a sinew lamination is not worth it!” I would beg to differ. Yes, shooting a sinew-laminated bow in a heavy monsoon downpour or in the summer months in Phoenix is dangerous. However, it is important to understand these are extreme cases. Therefore, it is up to the bow maker to evaluate his or her environment when making the decision on when and where to shoot a sinew-laminated bow.
What are the benefits of a sinew-laminated bow? When wet, sinew expands, but when dry it shrinks and becomes hard like fiberglass. This hard backing adds protection to the back of a bow and prevents it from breaking under tension. When hard, sinew stretches eight to ten times more than wood, which allows the shooter to draw the bow back further. By gaining extra draw length the bow will cast an arrow with noticeably more energy. Finally, as sinew dries, the bow will pull itself into reflex and prevent string follow in the limbs. As a result, the bow gains more energy and the sinew becomes a major contributor to a better performance. Indeed, sinew lamination has great benefits!
Back to making the bow! Once your bow stave is well seasoned, it is time to start constructing and manufacturing the bow. The first step is to look at the end of the stave and pick a ring to chase. By chasing a growth ring you are essentially establishing the back of the bow where the wood is under tension as the shooter pulls the string back. When creating a self bow, or a bow without a sinew lamination, if a single growth ring is not established it will break under tension. However, this is not the case with a heavily backed sinew bow. The laminated sinew becomes the back of the bow, thus protecting the wood under tension. With this said, depending on the wood I am working with, I will still take the extra measure of chasing a single growth ring.
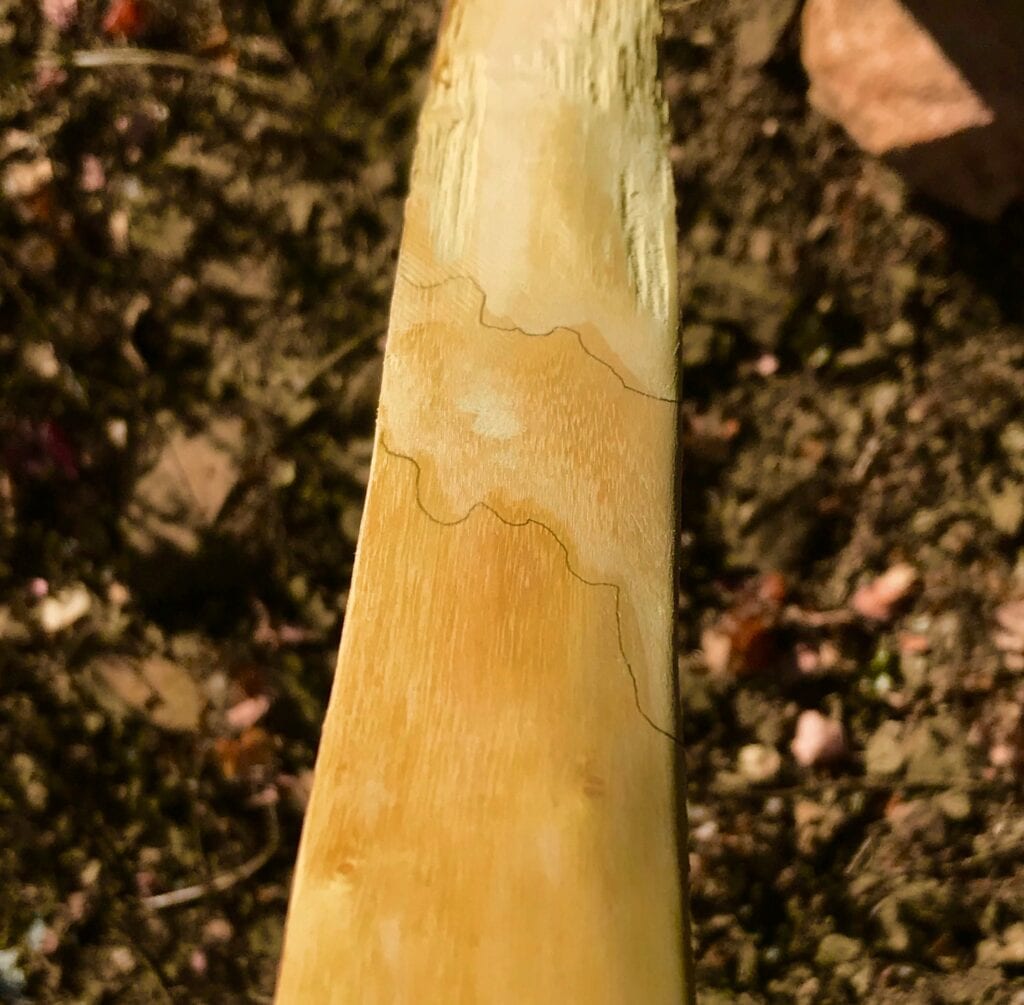
Chasing a ring is quite simple. With osage orange you will see pale-yellow early wood and brownish late wood. You want the late wood to run down the entire length of the stave. When looking at the stave you will notice variations in late wood rings. I highly recommend selecting a wide ring. Next, use your draw knife to remove the wood while looking at the end of the stave. When getting close to the desired ring, slow down, work in smaller sections, and chip away the top layers. As you approach the thin layer of early wood that covers the desired ring, stop and move to a different section. Repeat this pattern. Once the back of the stave has a thin layer of early wood exposed and covering the ring desired, use a scraper and sand paper to remove this early wood ring. This will expose the late wood ring that becomes the back of your bow.
Once the back of the stave is established the next steps are to remove sections of belly wood and shape the bow. Before removing belly wood, use your tape measure to accurately measure the entire stave length. With the tape still on the back of the stave, divide the number by two, and on the back of the bow make a mark at the divided number. This becomes the center of the bow. On each side of the mark, add two inches and etch two additional marks; this becomes your handle area. Now, from the belly side, use your draw knife to remove strips of wood. As you are doing this work carefully around the handle area, you don’t want to remove too much wood as the handle should be slightly thicker than the rest of the bow. After removing belly wood, place one limb of the stave (with the back facing down) on the ground and apply pressure in the handle area. When you feel the stave starting to slightly bounce you will know it is time to lay out additional measurements on the back of the stave with a pencil.
Initially, we want to establish a center line throughout the entire stave length. At the center of the handle make a mark and etch a line while following the grain (this line should go from the handle to the tip). When one half of the stave has a center line, repeat the same process on the other half. Next, measure your desired width and on each side of the center line, make marks every three inches along the length of the stave. Proceed by etching a line and connecting the spaced marks together. Now you will want to taper the tips of the stave. From the center line measure a quarter of an inch on both sides and make marks. Then, place the tip of your ruler on each mark and position it so the ruler becomes a tapering guide. The ruler should taper off of the stave at the eight to twelve-inch mark. Once positioned right, simply etch your two lines and repeat this process on the other tip. Finally, use your draw knife and file to remove the wood up to the pencil lines. Now your stave is starting to look like a bow. At this point we discuss floor tillering.
Floor tillering is the process of removing belly wood and bending the limbs on the ground before stringing the bow. When floor tillering, I recommend removing even and consistent amounts of wood by working from the tips to the center of the handle. With a short sinew-laminated bow, you want the bend to work throughout the entire length. What’s more, the tips should not carry too much mass, as this will slow arrow speed down. As you work on floor tillering, constantly check for stiff and weak spots in the wood. If there is a weak spot that appears to bend too much, do not file or scrape that area. Continue the process of floor tillering while keeping in mind that the bow should not bend too much. Rather it should feel on the heavy side.
Once the bow is bending, it is time to cut in nocks, recurve the tips, and string it. While there are many different types of string nocks, I usually cut in pin nocks. When cutting in nocks, work slowly and make sure there are no sharp or flat edges where the string will rest. When the nocks are filed in, submerge the tips in boiling water and then place them in a vise. I slowly bend them into recurve and let the bow sit for two days. Once the tips are dry again you will notice the bow is much heavier when bending it on the ground. Simply resort back to the floor tillering process by scraping the belly side. When the bow bends again, string it up and allow the limbs to settle for a minute or two. With a new string, this will take multiple attempts as the string stretches and the limbs relax. Once strung at a low brace height, place the bow on a tillering tree and bend the limbs. If stiff spots appear, work on those areas. Continue to tiller and make sure the bow is bending evenly throughout the entire length. When tillered to fourteen inches of draw length, stop and prepare to add your sinew lamination.
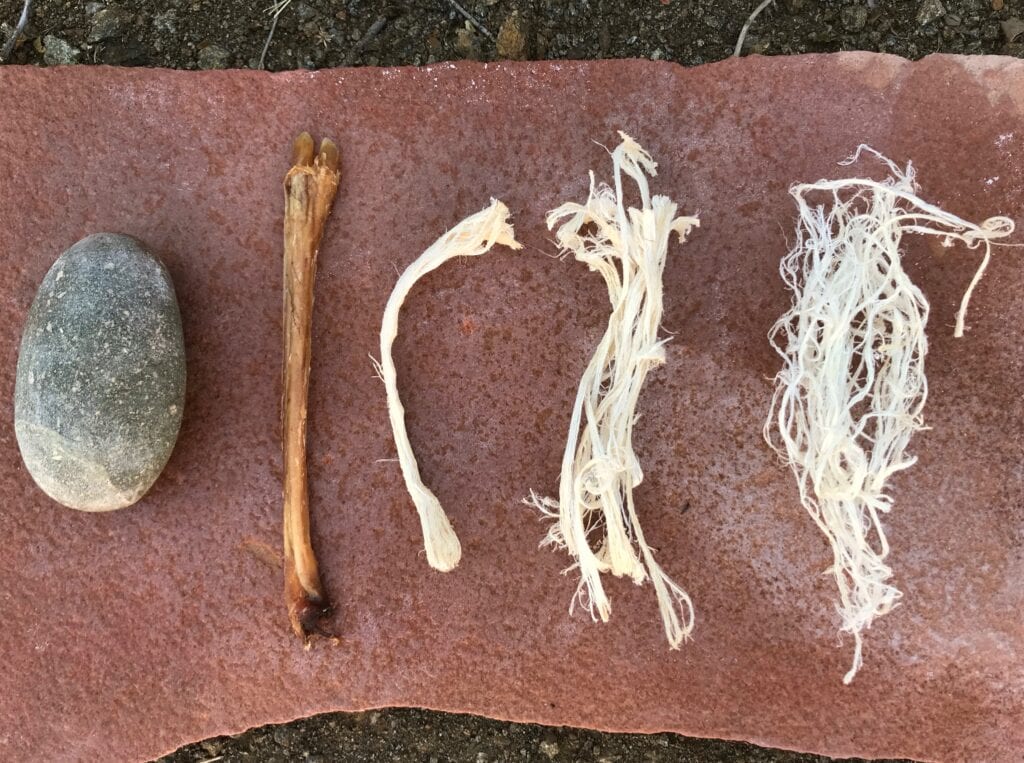
Before laminating the back of the bow with sinew, further preparation must be completed. These next steps in preparation are easy and take little effort. First, sand the back with eighty-grit sandpaper and remove excessive wood dust. Second, wash the bow in hot water and dawn dish soap. Finally, roughen the back by lightly scraping it with a hacksaw blade. These steps are critical when laminating a bow with sinew and should not be skipped. Essentially you are degreasing the back and creating a platform where the sinew and glue can bond to. If the back is not clean the chances of sinew de-lamination during the final tillering process increases. Once clean, allow the bow to dry for three days. During this drying time begin processing your sinew. I recommend processing about twenty deer leg tendons. To do this, simply mash the tendons on a smooth hard surface, pull off the outer husk, and continue to strike the tendon. As you notice the tendon becoming softer, pull apart the individual sinew fibers and create bundles of sinew. You now have everything ready to laminate the bow.
In a dry environment it is critically important to sinew the entire bow in one single session. The reason for this is because as the sinew dries, additional layers cannot be added. Moreover, like an unclean back, additional layers on a dry surface will not adhere and de-lamination will occur during the final tillering process. When laminating the bow, pre-heat a crock-pot with about a half-pound of hide glue inside. Once you feel the temperature rising add small amounts of water until a warm and thin syrup-like consistency rests inside the pot. Place your processed sinew fibers in a separate bowl of water and allow them to fully hydrate. Next, coat the surface of the bow in a thin layer of warm hide glue. Remove small bundles of sinew from the water and dip them in glue for about twenty seconds. Squeeze out the excess glue from the bundle and press them on the back of the bow. A good backing should consist of three layers of sinew with a light crown down the center. Between each layer of sinew, I recommend coating the surface with a thin layer of glue. Furthermore, it is important to stagger the sinew bundles in order to prevent weak spots in the bow.
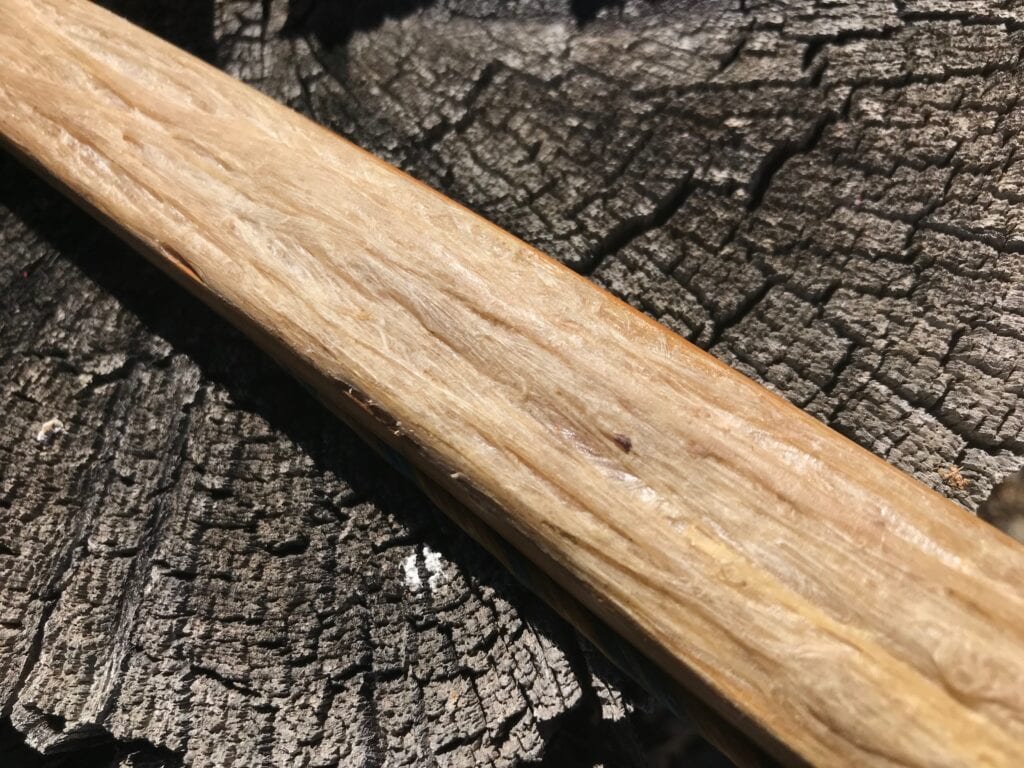
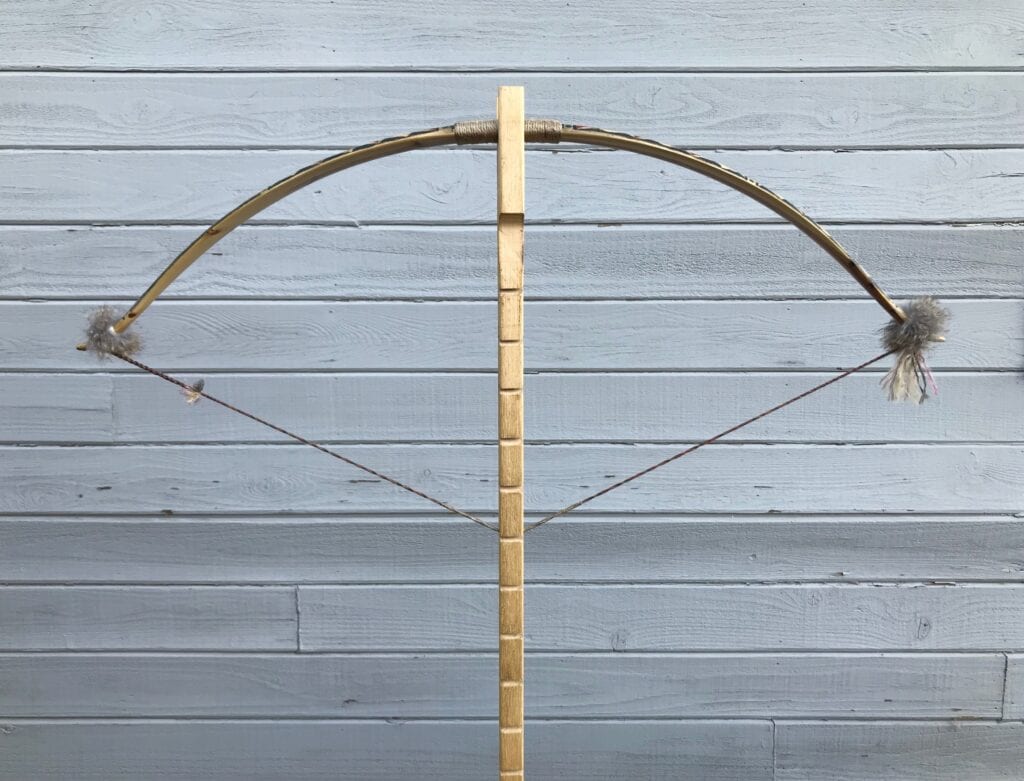
After the bow is laminated with sinew the drying process begins. Depending on the climate in which you live, drying times can last anywhere from four to eight months. If you live in a dry environment, you will not want the lamination drying too fast. It would be wise to store the bow in a humidified room. If the lamination does dry too fast, longitudinal cracks will likely form in the belly. These cracks do not seem to negatively impact the bow, but they are not pleasing to the eye. As the sinew lamination becomes leather-hard, I will then string the bow backwards. This pre-stressed construction creates reflex in the limbs, thus contributing to more stored energy when the bow is tillered and shooting.
Four to eight months later you will notice the sinew has reduced quite drastically, and the bow has gained reflex. At last the bow is ready for final tillering! When tillering a sinew-laminated bow, work slowly and pay close attention to details. Tillering a bow high in reflex is not easy. In fact, this process is extremely complex. You will notice the bow feels stiff and does not bend anymore, this is completely normal. Sinew adds weight to the bow but can also be deceiving. I recommend scraping the bow to a floor tiller once again. As you scrape and the bow continues to bend, string it heavy. With a highly reflexed bow I strongly recommend having another person help string it. One person should place the handle on their foot and pull the limbs back, while the other places the string inside or around the nock. This allows the person holding the bow to control the limbs as the string stretches. If stretching becomes extreme without a person controlling the limbs the bow can quickly reverse itself, thus resulting in a broken bow on the belly side.
Once the bow is strung and set at a safe brace height, place it on a tillering tree and work the limbs. If you see stiff areas, remove wood in those spots. If weak spots are visible, avoid them and mark an “X” where they occur. Hopefully the bow has an even tiller and wood can be removed with equal distribution. As you tiller the bow and increase the draw length, I recommend shooting the bow in profusion. This allows the bow and sinew to stress and settle in. Finally, when the bow is tillered and you have a desired draw length that is not too extreme, it is time to finish your project. The final steps are sanding the belly smooth and applying bear fat to the belly side as a polish. Once the polish is dry, shoot the bow repeatedly during the next week. Make sure that no changes in tiller occur and the bow continues to bend evenly. After shooting the bow at least one hundred times without a change in tiller, your bow is complete!
In conclusion, the sinew-laminated bow is truly a work of art and a great accomplishment. In the end, almost all respectable bow craftspeople will validate the effectiveness of these bows. It is important to know the sinew-laminated bow did not just appear suddenly in history. Rather they are the result of a slow evolving process through experimentation, the sharing of ideas, and the desire for technological achievement. From the introduction of the atlatl to the complexity of the bow, anthropology and Native oral tradition has provided substantial understanding about how complex and well-organized past cultures were.
For More information on bow making and making a Hupa style bow visit: www.YouTube.com/PrimitiveLifewaysChannel
Author: Jeff Martin
Edited by, Jim Moses